Exchange 2016 Hybrid Configuration
Exchange 2016 Hybrid Configuration
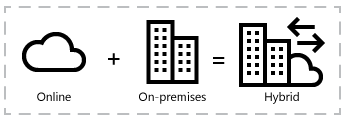
A hybrid deployment is a combination of on-premises applications and cloud-based services. For example, Exchange hybrid solutions could include using an Exchange Server on-premises and Exchange Online in Office 365.
There are multiple ways to configure mail routing with a hybrid organisation, but for the purpose of this blog post, the focus will be on a non-centralised mail routing.
What does this mean?
It simply means that on-premises mailboxes will use the local outbound connectors and Office 365 outbound mail will use connections through Exchange Online Protection (EOP)
To get started with the Hybrid, the following needs to be in-place.
- Azure AD Connect
- Office 365 Tenant with Exchange Online
- Valid SSL Certificate
To start the hybrid configuration, Launch the EAC and Navigate to Hybrid. Then click on Configure.

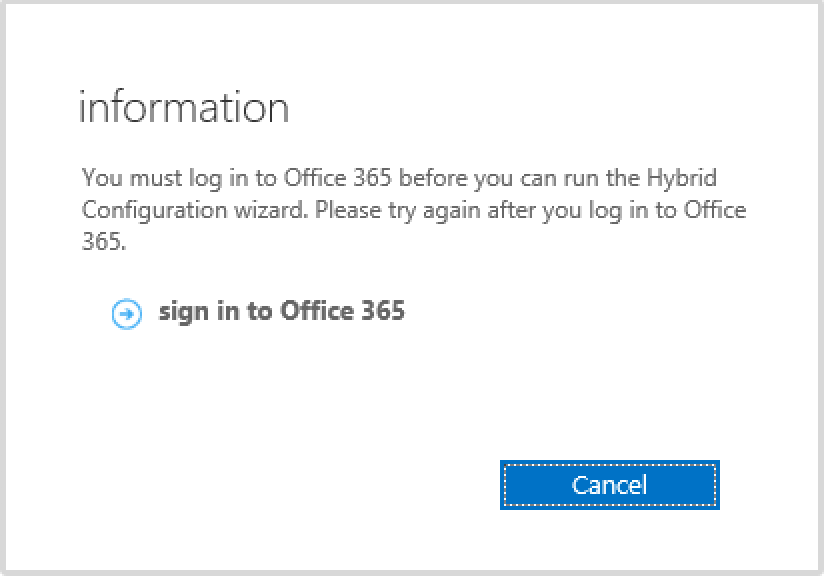
Once you click on Configure, you will be asked to sign in to Office 365. Provide the details of the Global Administrator.
If you get a “412 Cookies are disabled” message, add these URLs to the Local Intranet Zone:
https://login.microsoftonline.com
https://portal.office.com
https://outlook.office365.com
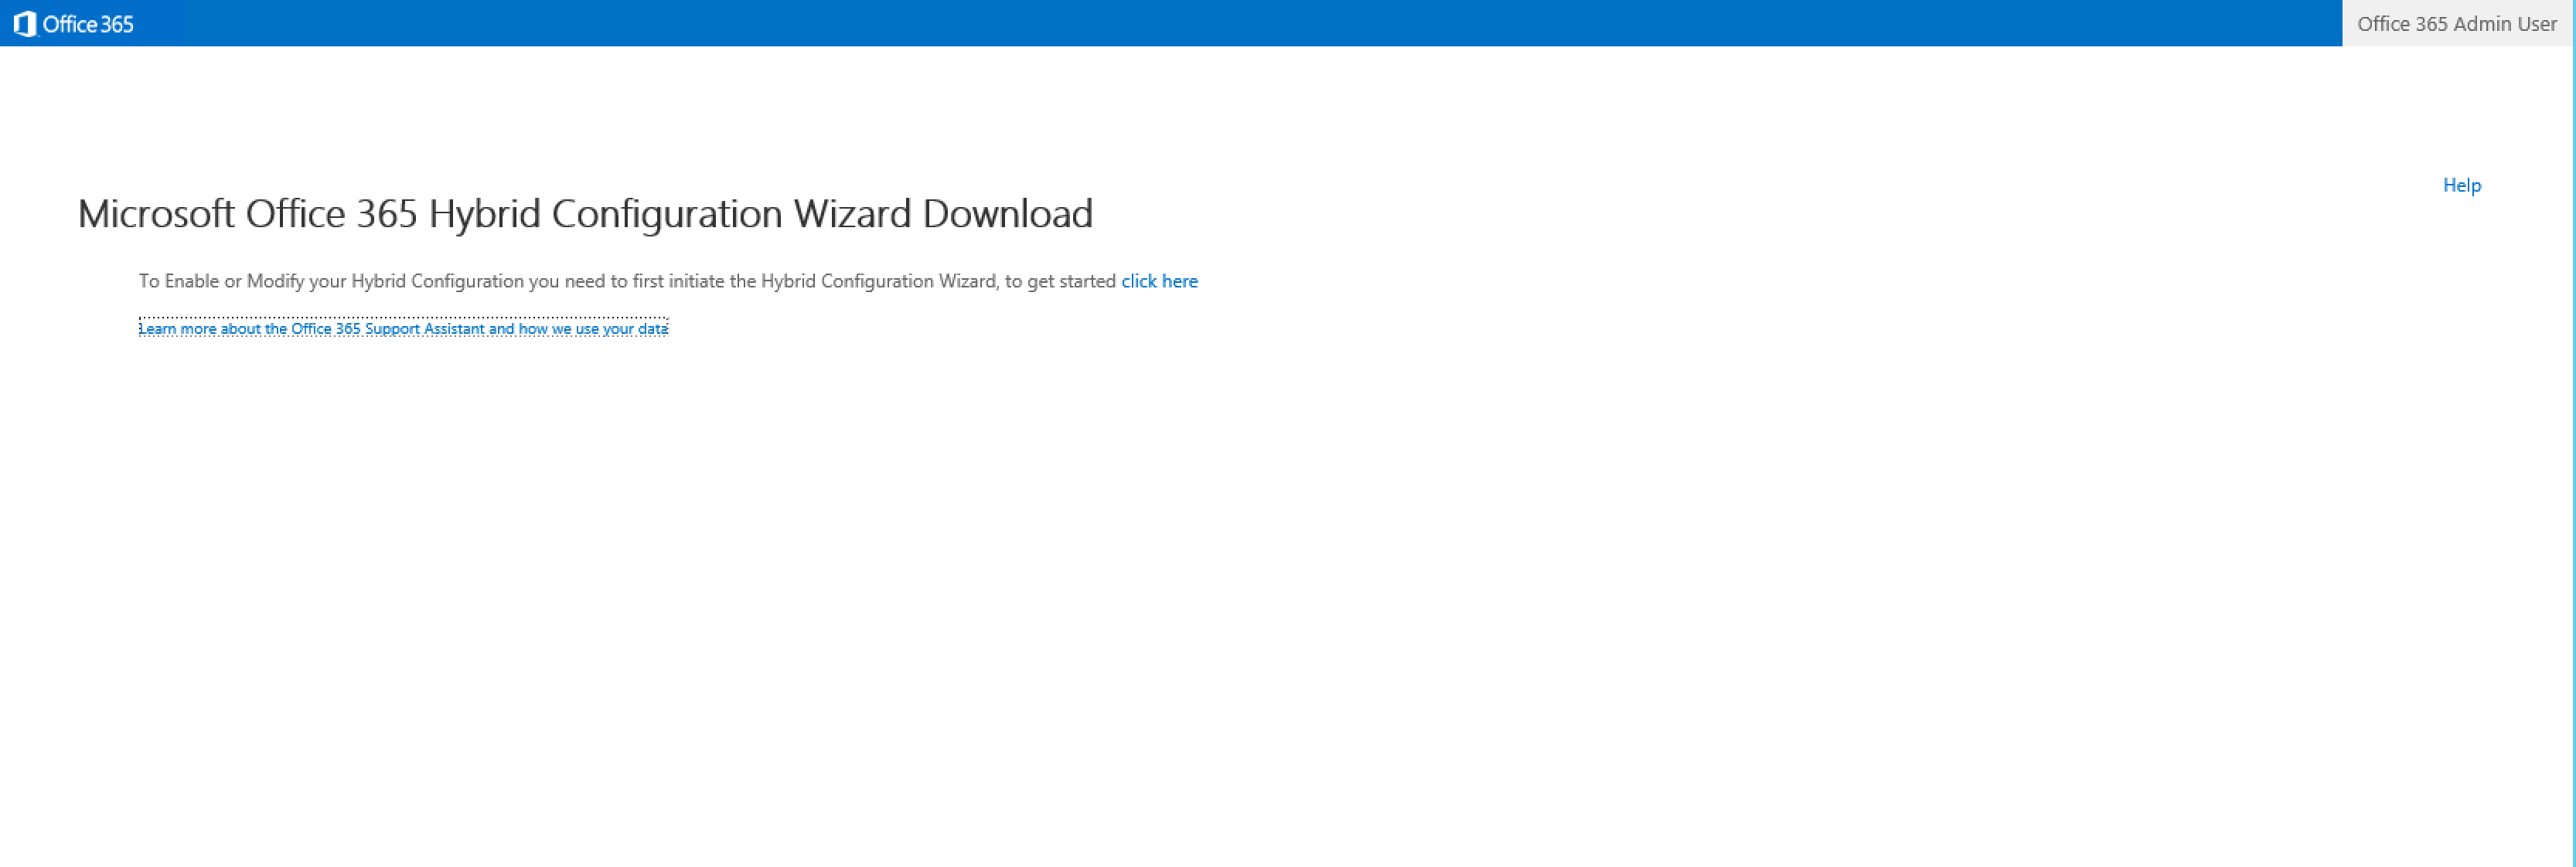
The page will redirect to the Microsoft Office 365 Hybrid Configuration Wizard. Click on “Click Here”, to start the process.
The Hybrid Configuration Wizard will prompt to be installed, click on Install.
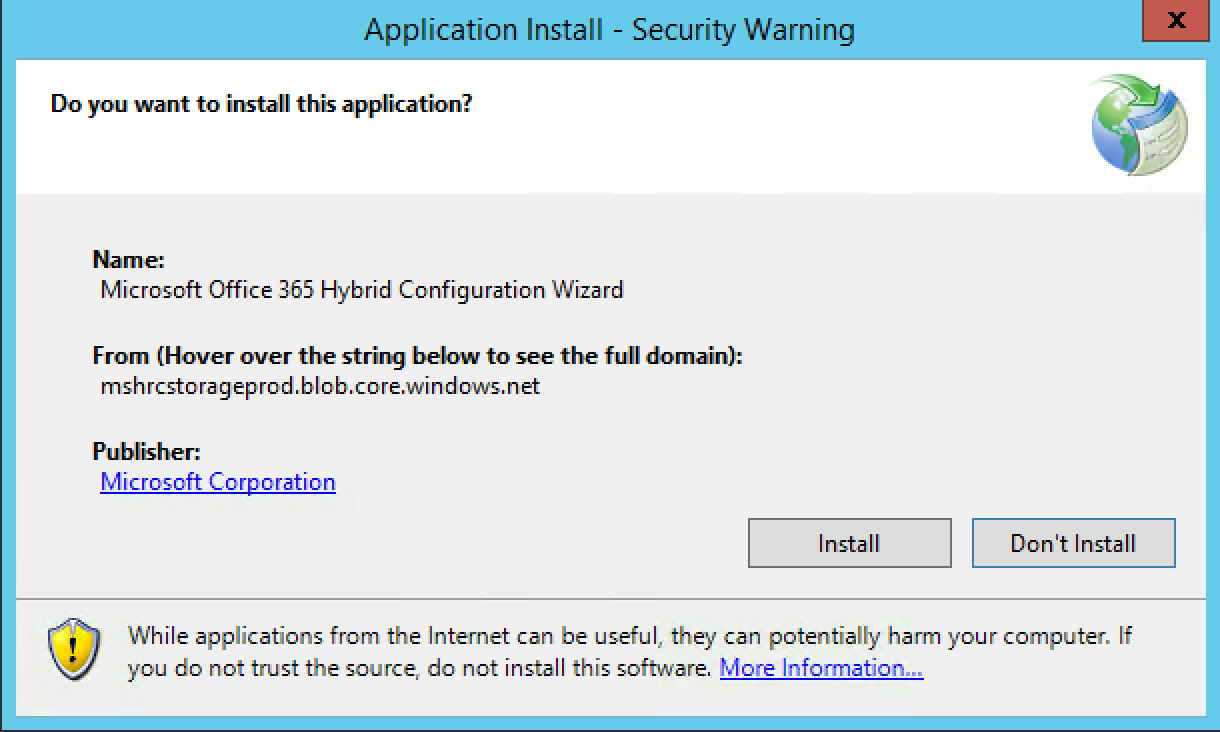
The needed files will download before starting the installation.

After the Installation, the Hybrid Configuration Wizard Will Launch. Click on Next to continue.

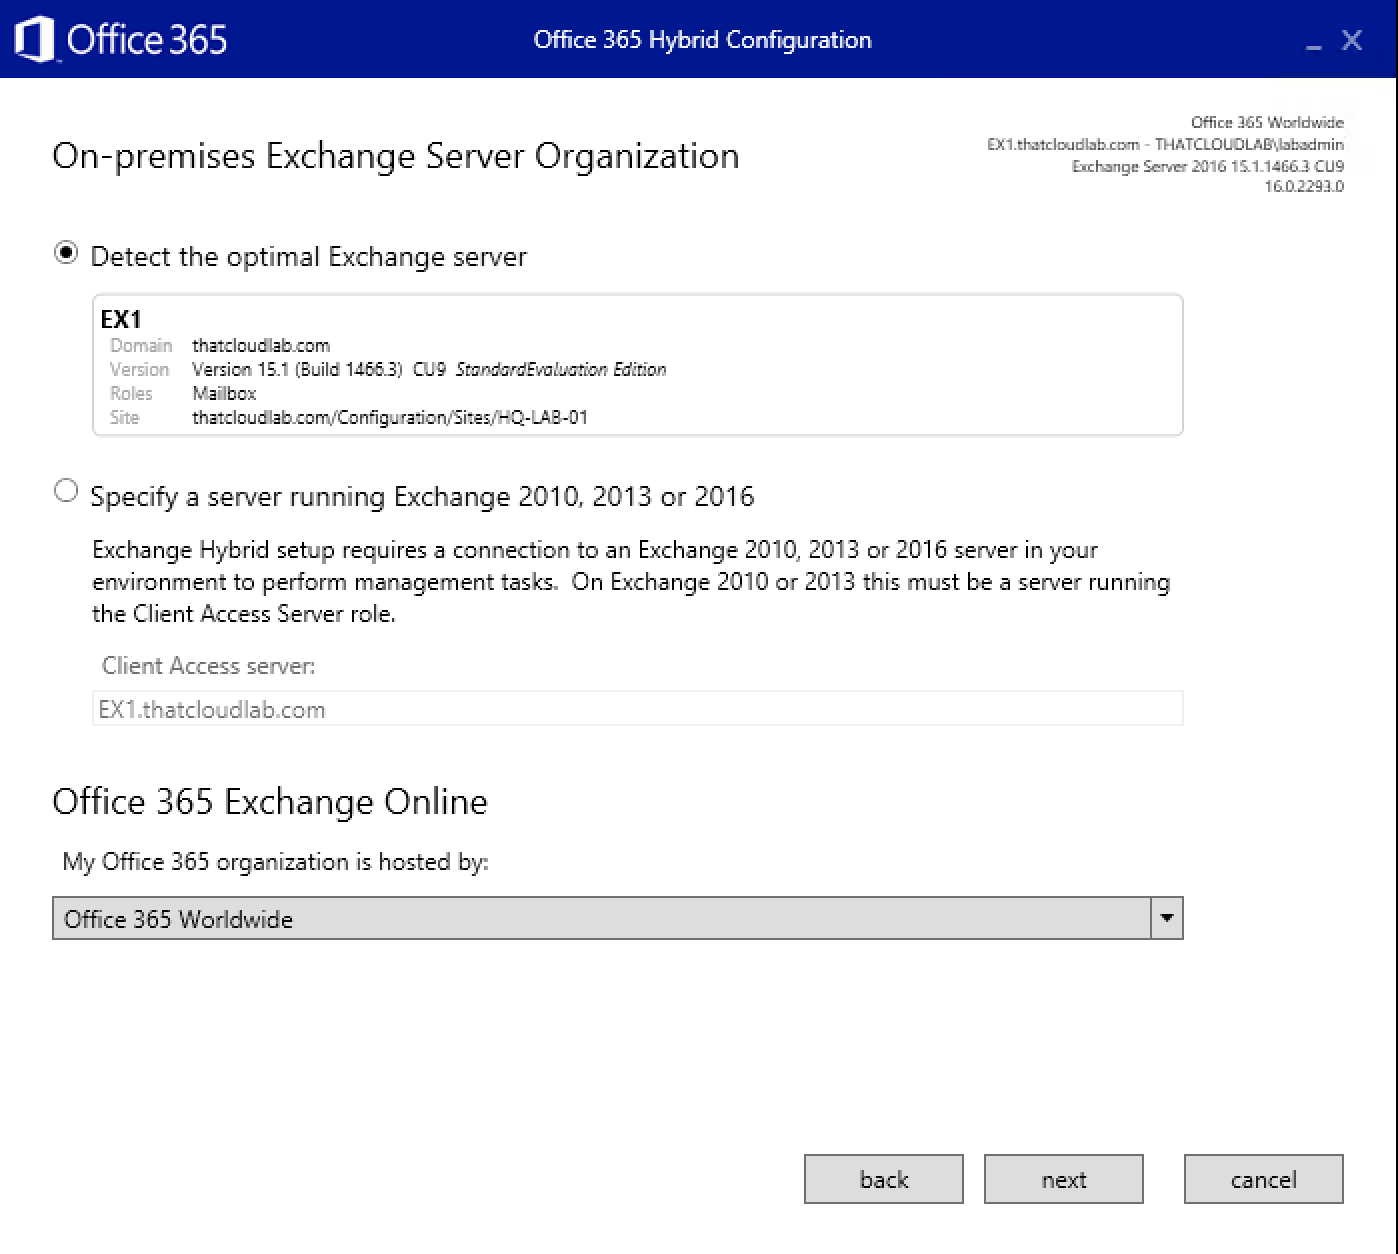
The Wizard will go ahead and detect your Exchange Organization, once the detection process is done, click Next.
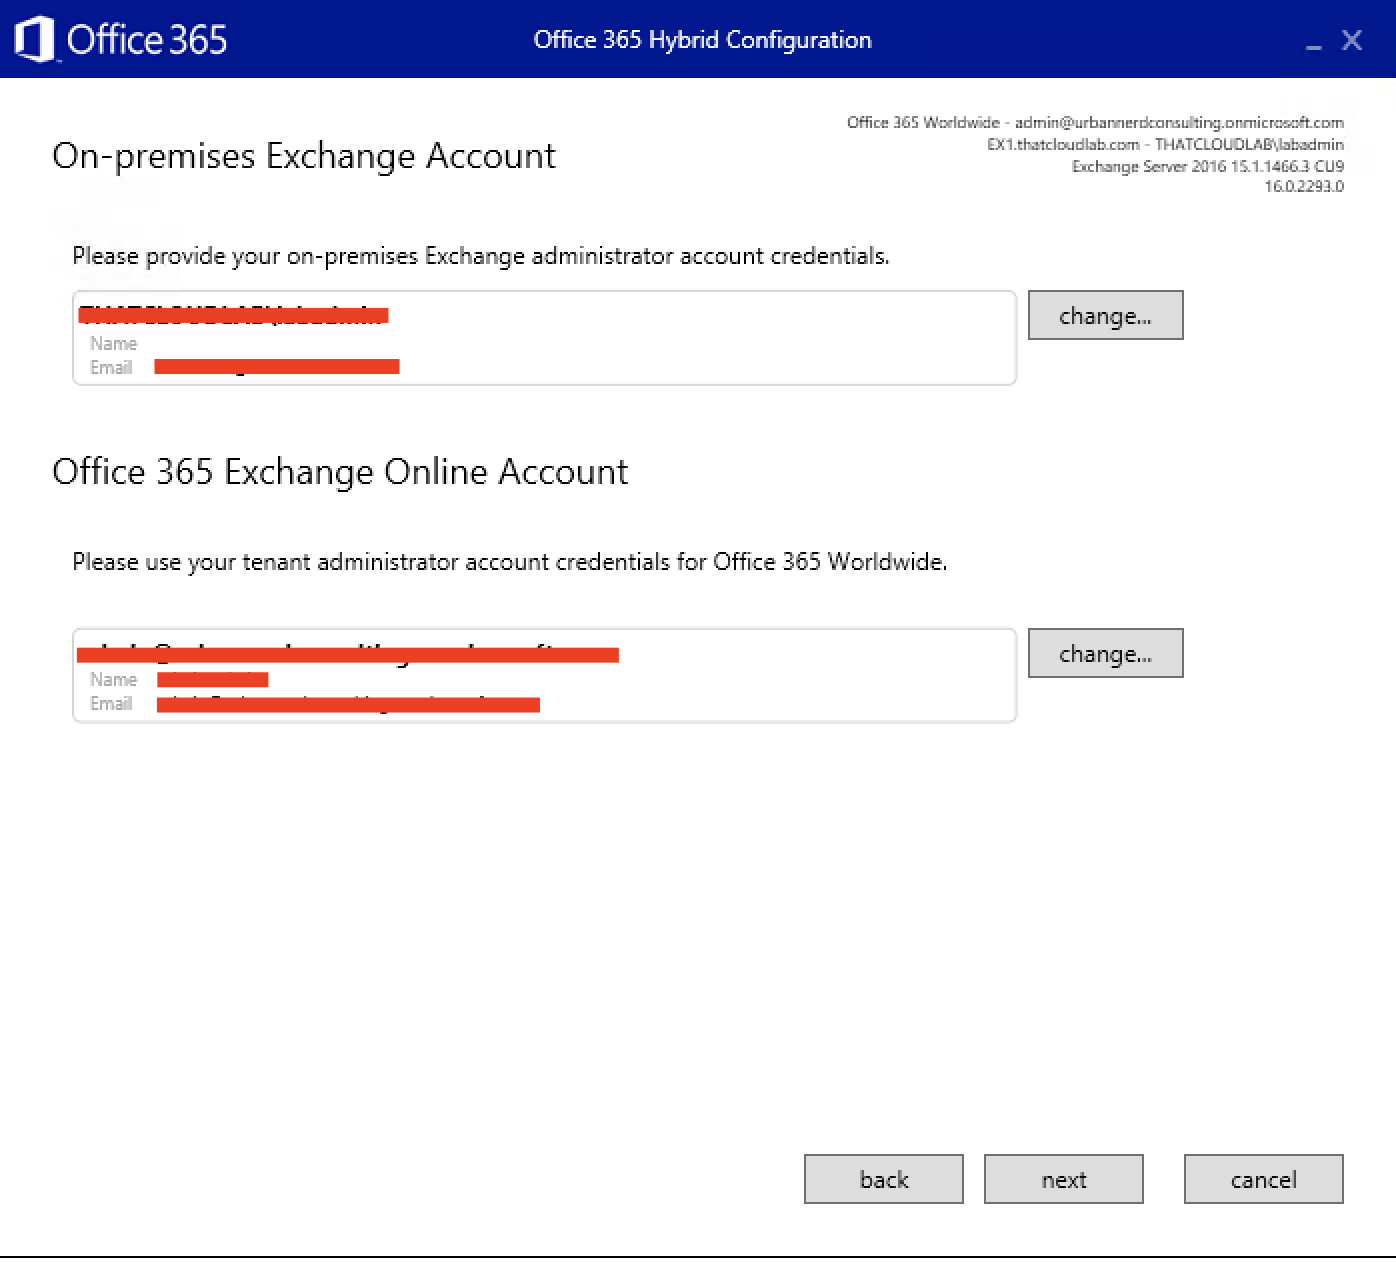
On the section of the Wizard, a local admin account needs to be provided that has admin access on the Exchange Organization and a Global Administrator account for Office 365. Then Click Next.
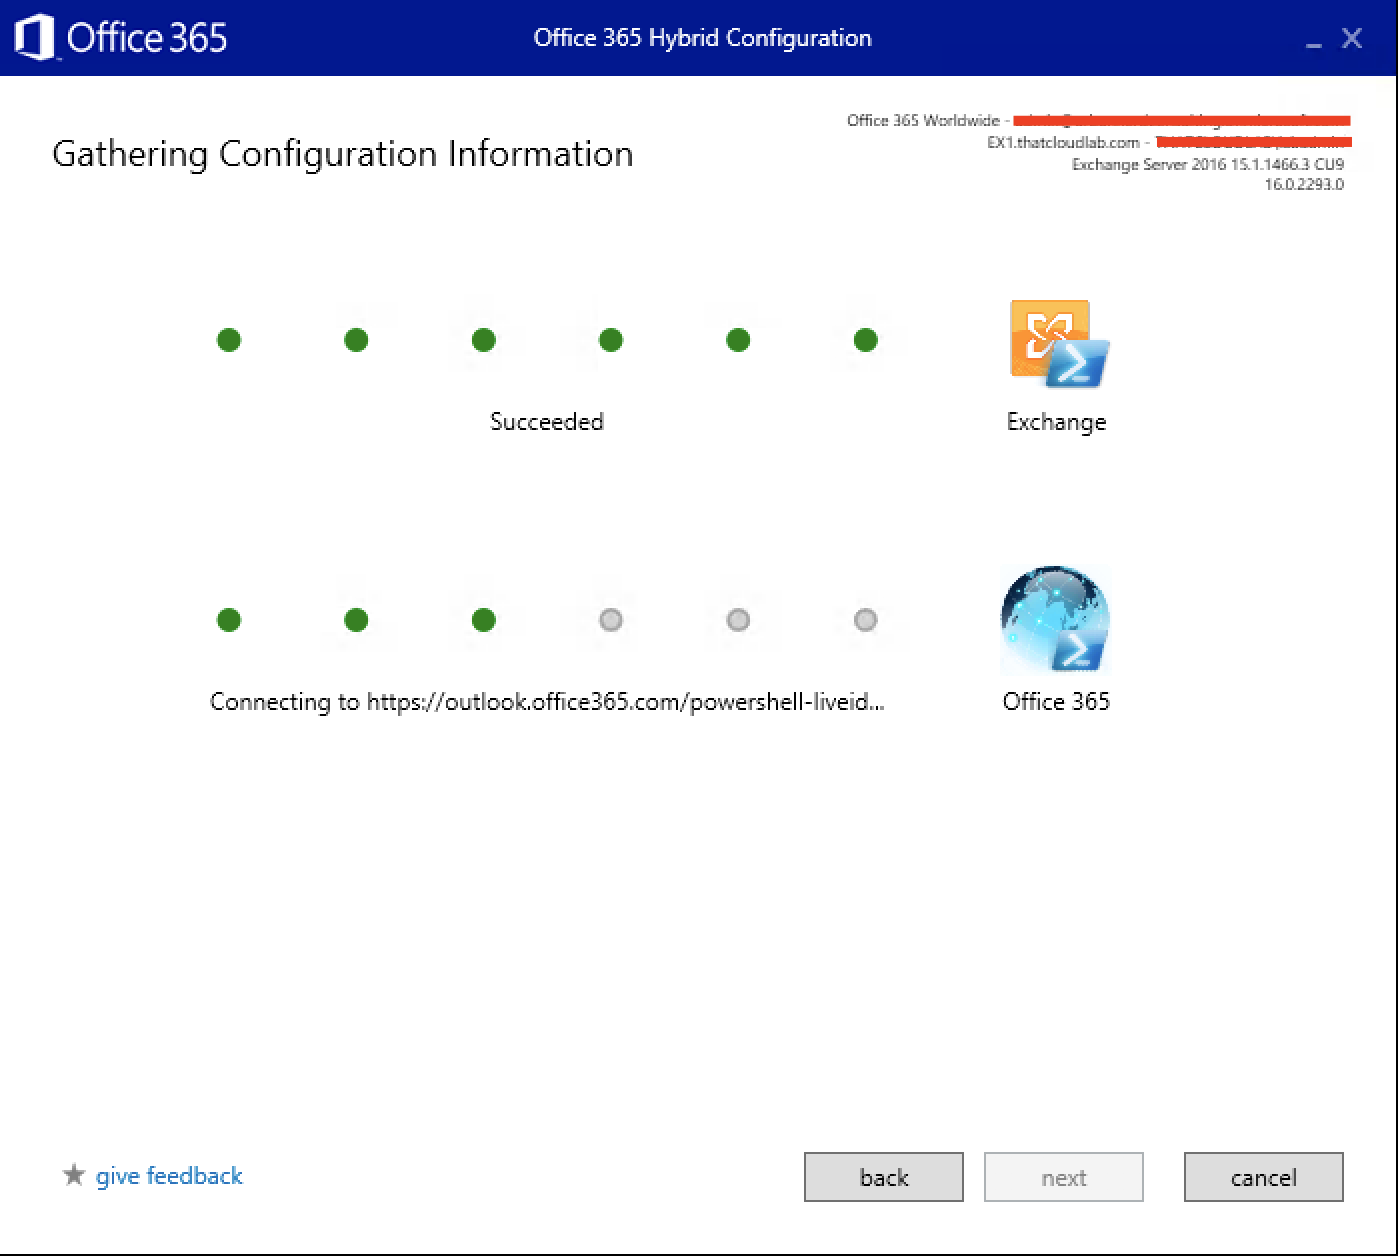
The Wizard will go ahead and gather all the needed information about the On-premises environment as well as Exchange Online.
Once this process is completed, click on Next.
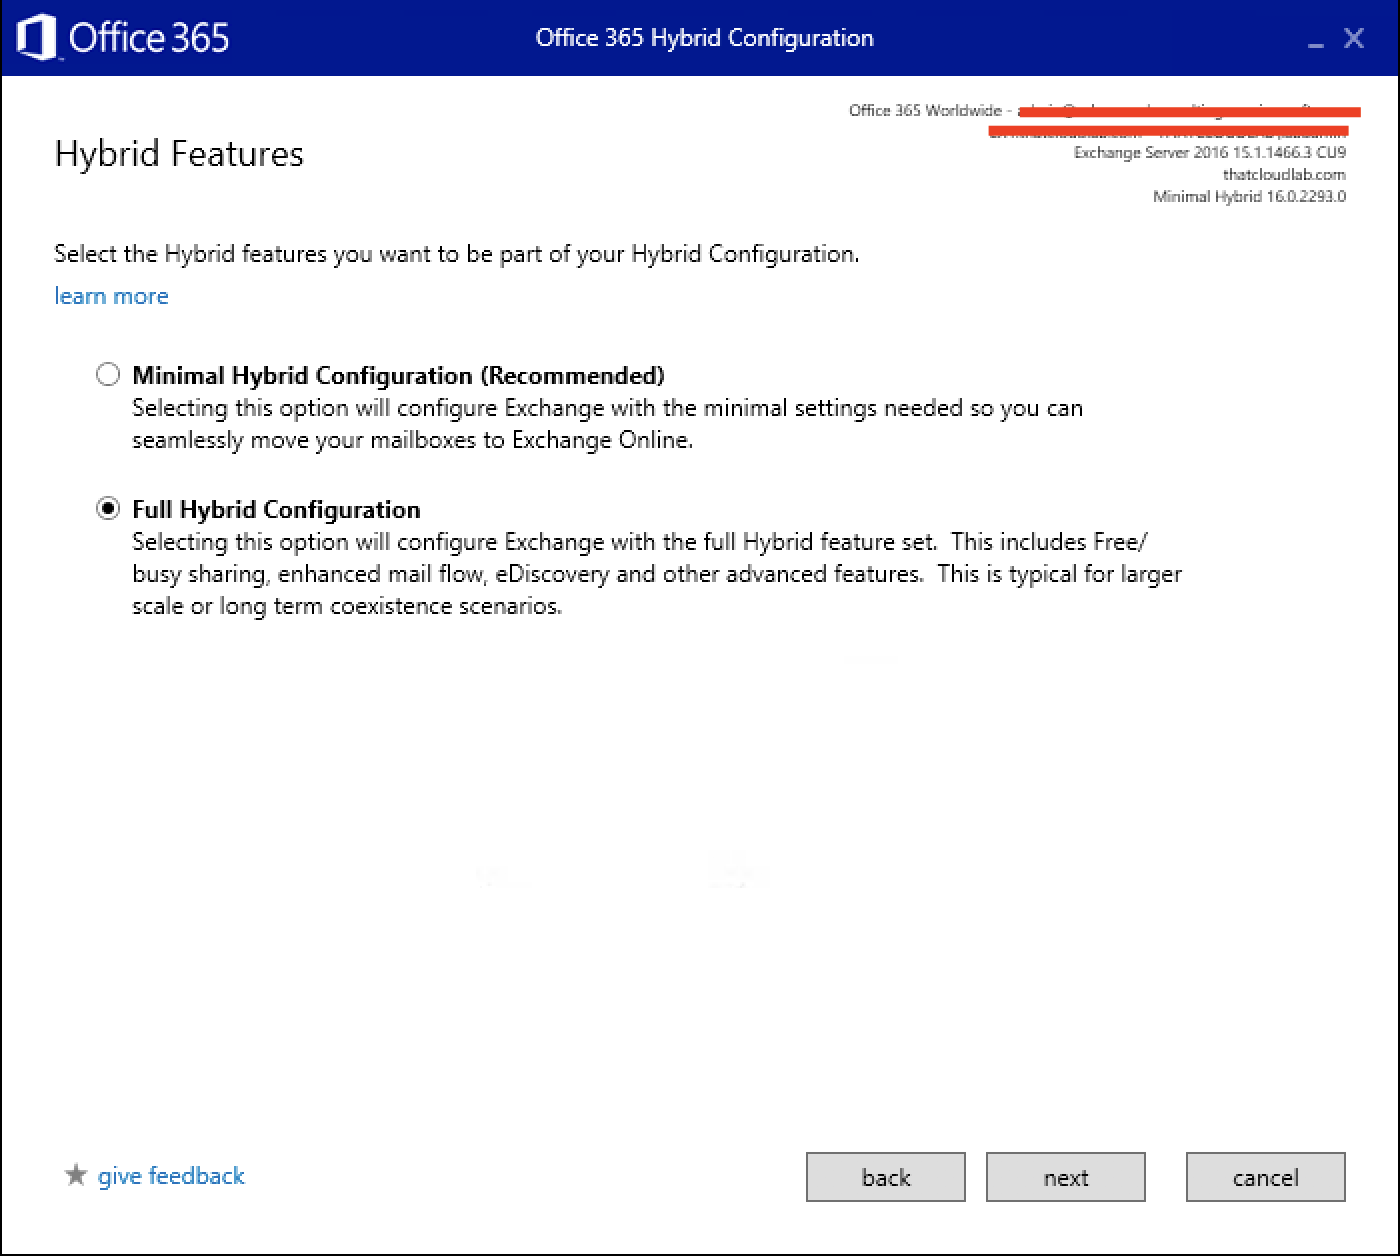
On the next part of the Wizard, you will have to select between Minimal Hybrid and Full Hybrid. This post will focus on Full Hybrid.
What is the different between Minimal and Full Hybrid?
Full Hybrid:
This is a common configuration for customers that are larger in size and will take some time to migrate or customers that will not be able to move all their mailboxes to Exchange Online in the short to medium term. This is the most complex option to configure, but will give you enhanced features like cross-premises free/busy and enhanced mail flow options. For more on Full Hybrid you can go here.
Minimal Hybrid:
This is a recently introduced option that was added to the Hybrid Configuration Wizard in June. It allows you to configure your environment to support hybrid migrations and recipient administration without the need for the additional overhead of configuring free/busy and other enhanced features of full hybrid. Often this is used for customers that want to move all their mailboxes to Exchange Online over the course of a couple of months or less, but want to keep directory synchronisation in place. For more information on Minimal Hybrid please go here.
Select your Hybrid option and click Next.
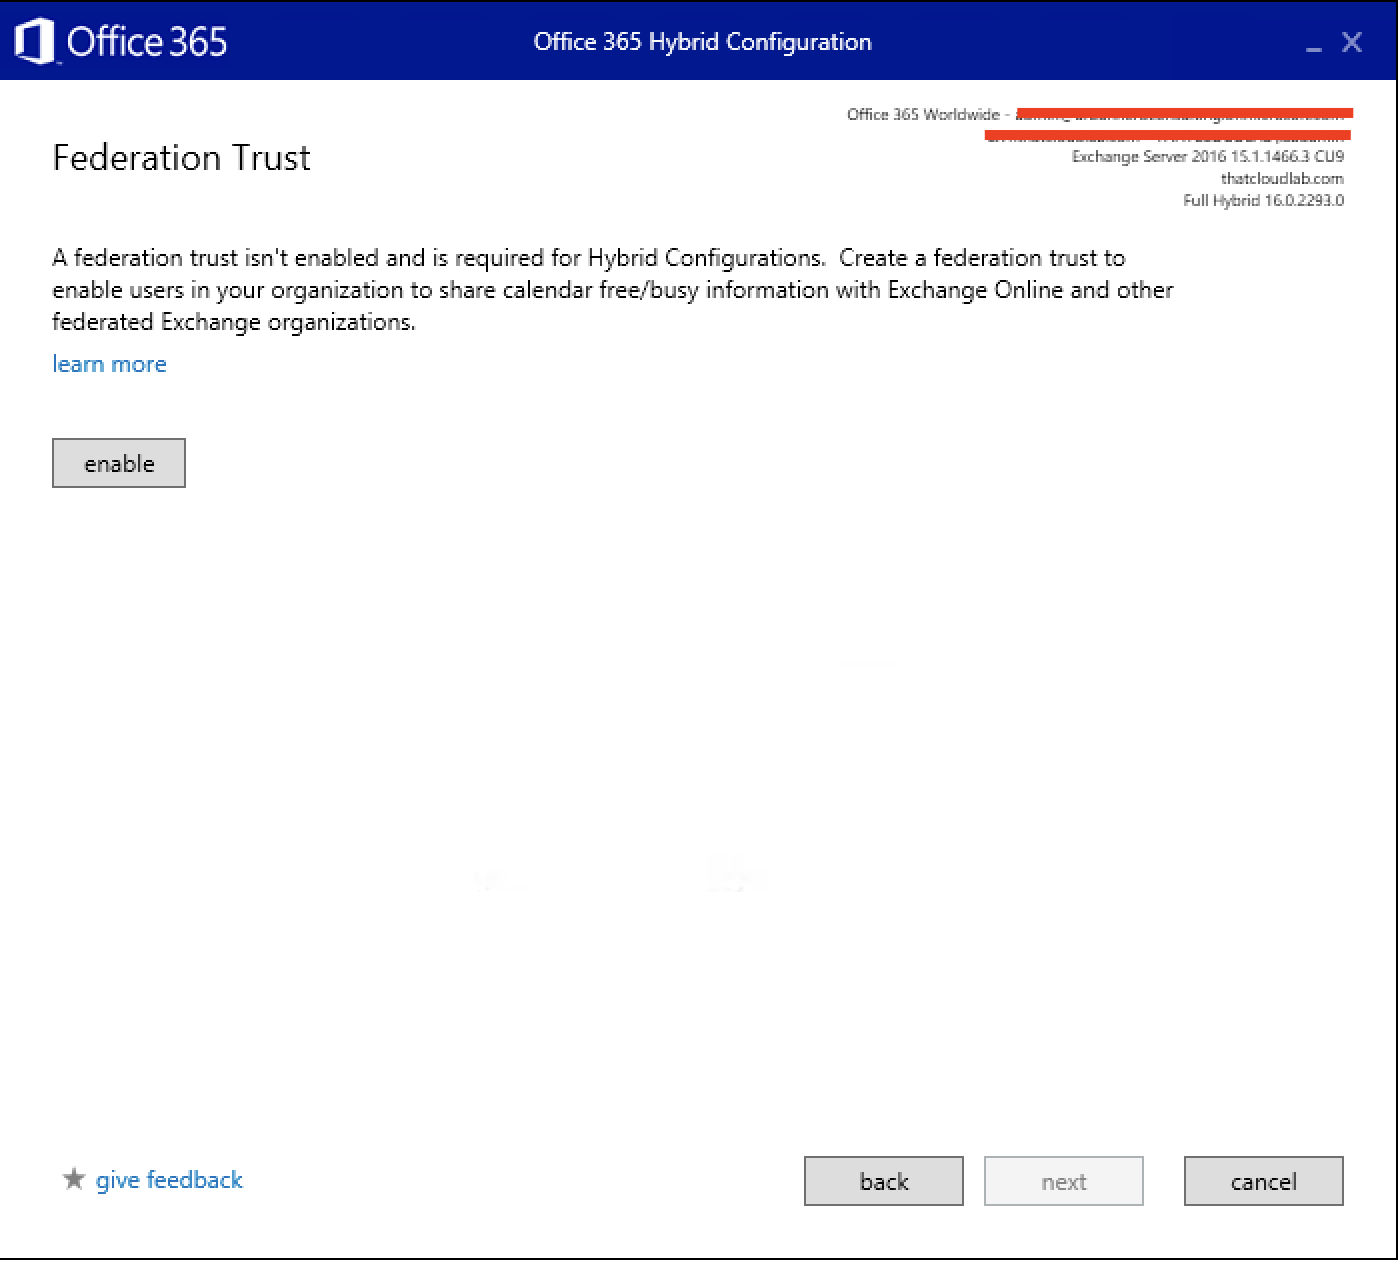
On the Next screen, Click on Enable for Federation.
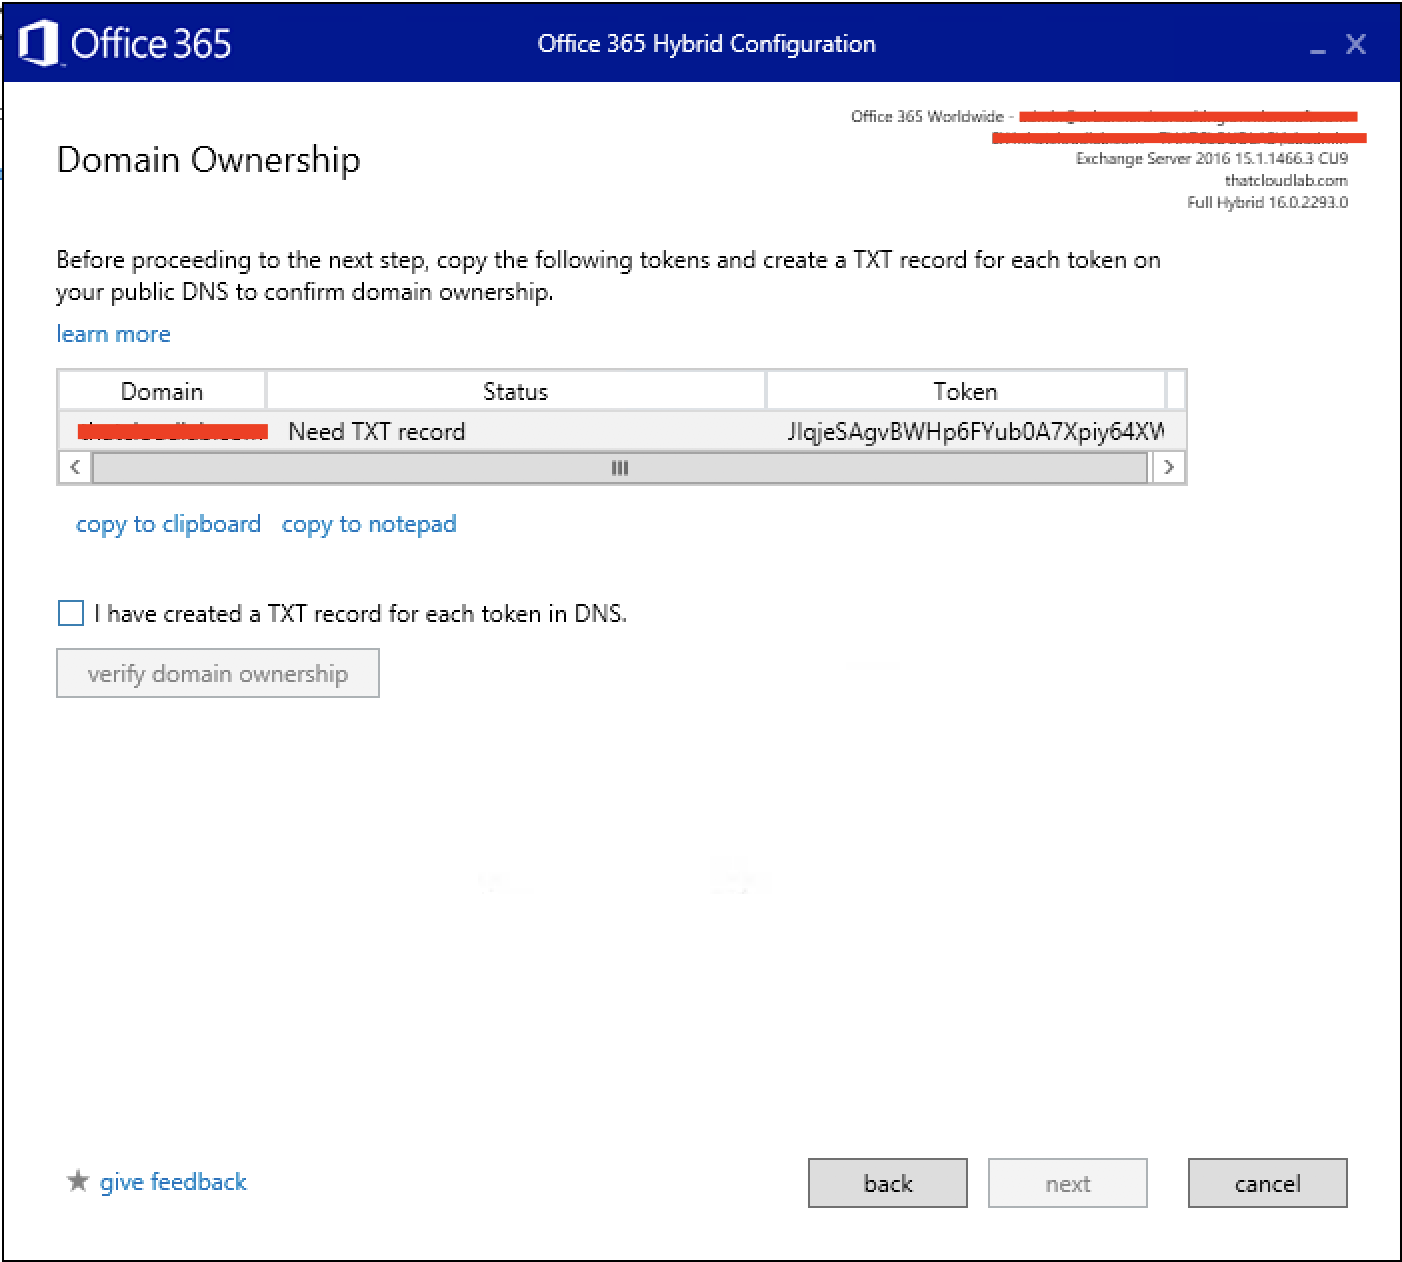
Next, we need to create a TXT record to verify the Domain ownership. Tick “I have created a TXT record for each token in DNS.” Then click on verify domain ownership.
Once the domain verification is completed you will be prompt to select how you want to configure mail flow for the organization.
The mail flow configuration we will keep as Typical and we will not be configuring a centralized mail flow as mentioned in the beginning of the post.

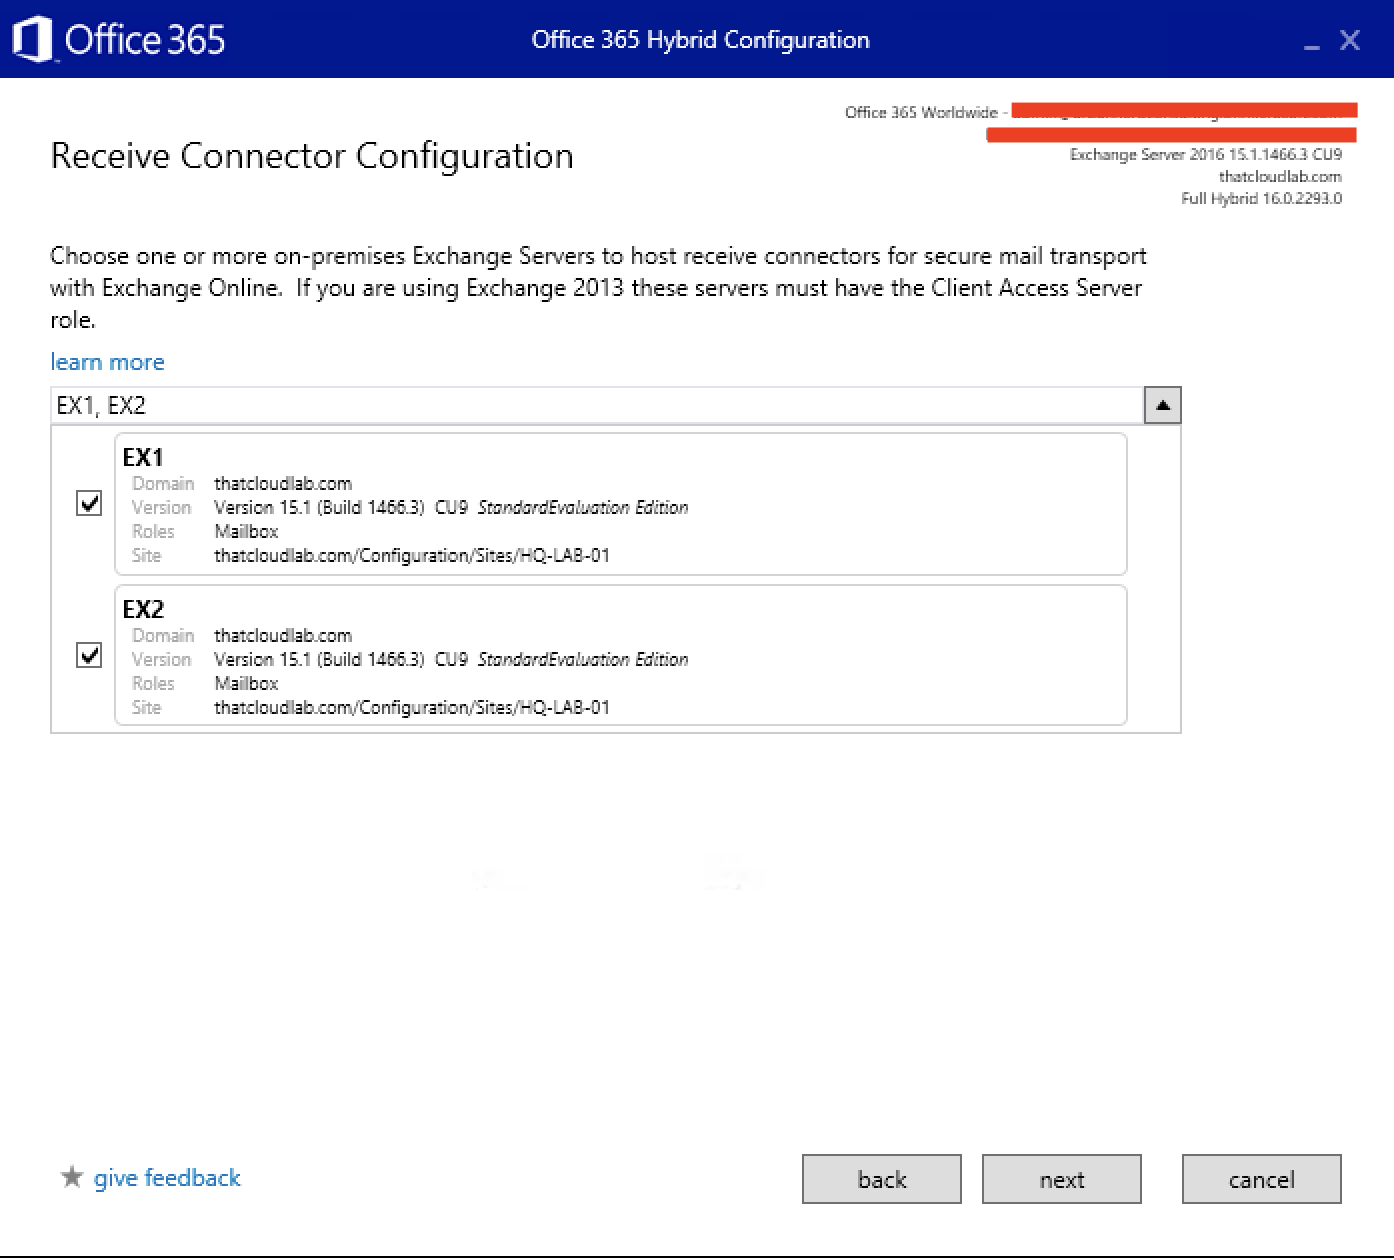
Next, the Exchange servers where the receive connectors will be configured needs to be selected. In my environment I will select both Exchange servers, so that both of them can be configured to host receive connectors for Exchange Online.
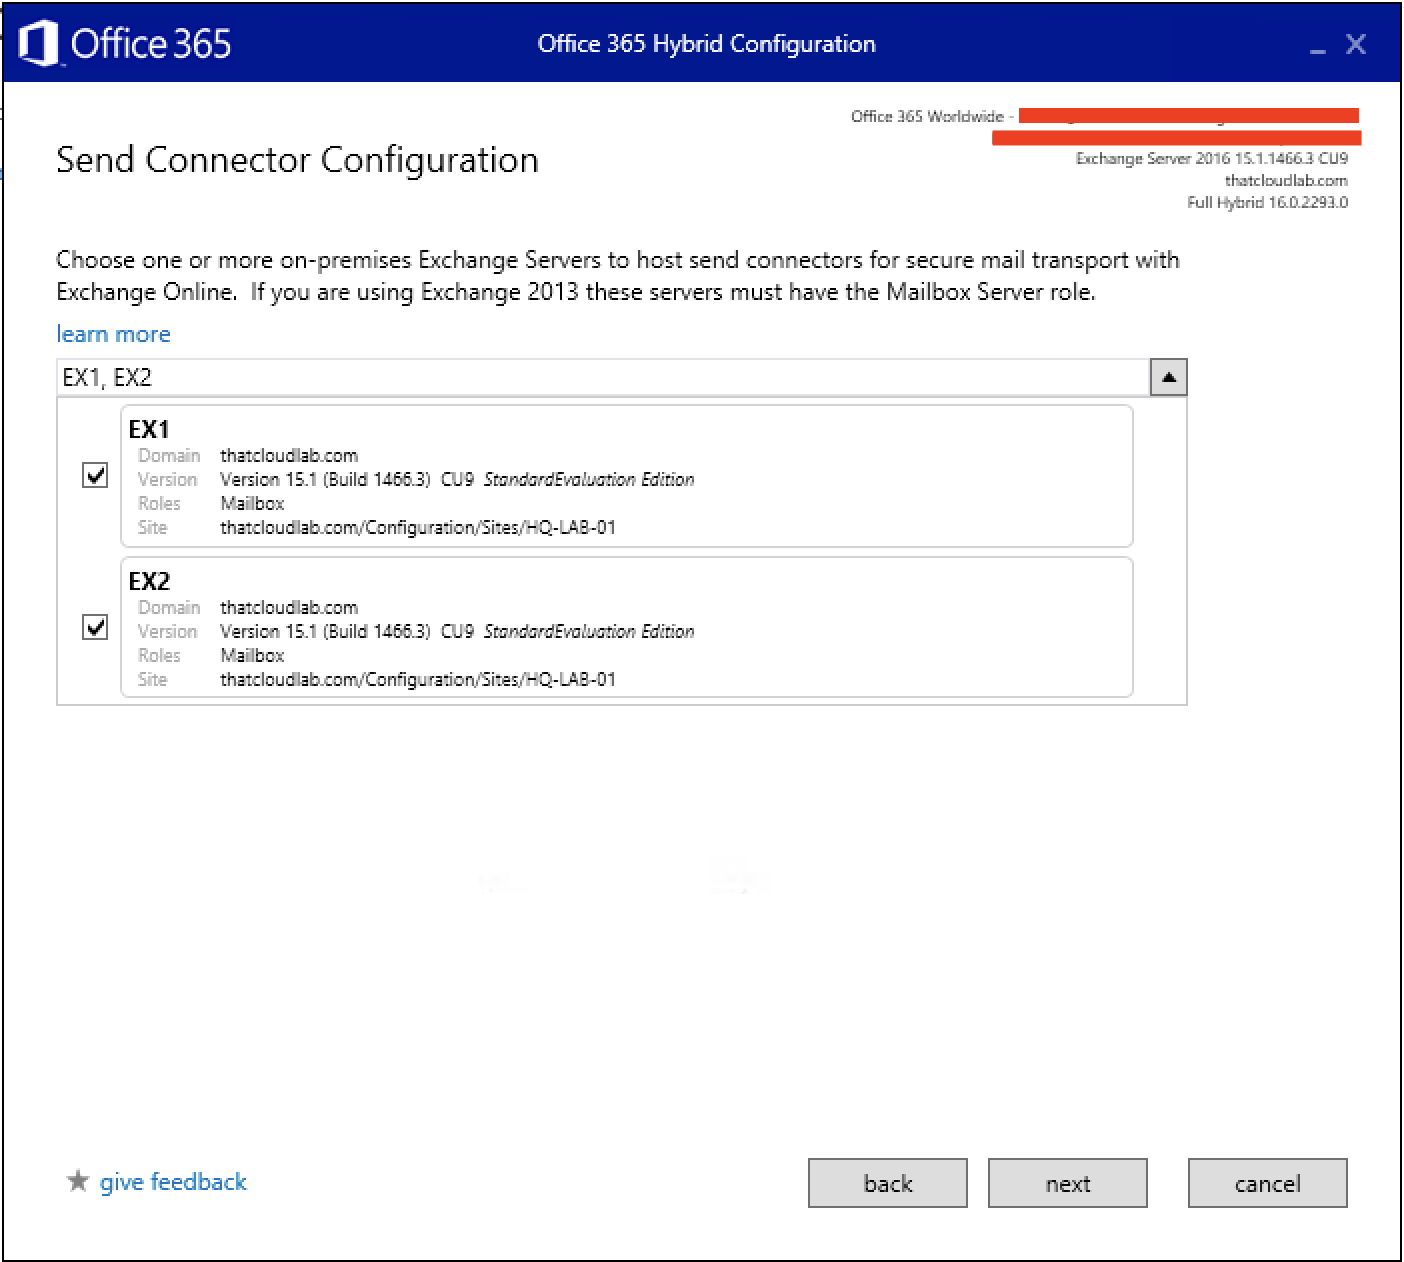
On the Next screen, the same needs to be done for the Send Connectors.
Next, a valid SSL certificate needs to be selected which is installed on both Exchange Servers.
Once done, click on Next.

Next, we need to provide a valid FQDN for the Organization.
Example: mail.thatcloudlab.com
Click on Next, to start the update process.

On the Next screen, click on Update to start the process of configuring the Hybrid.
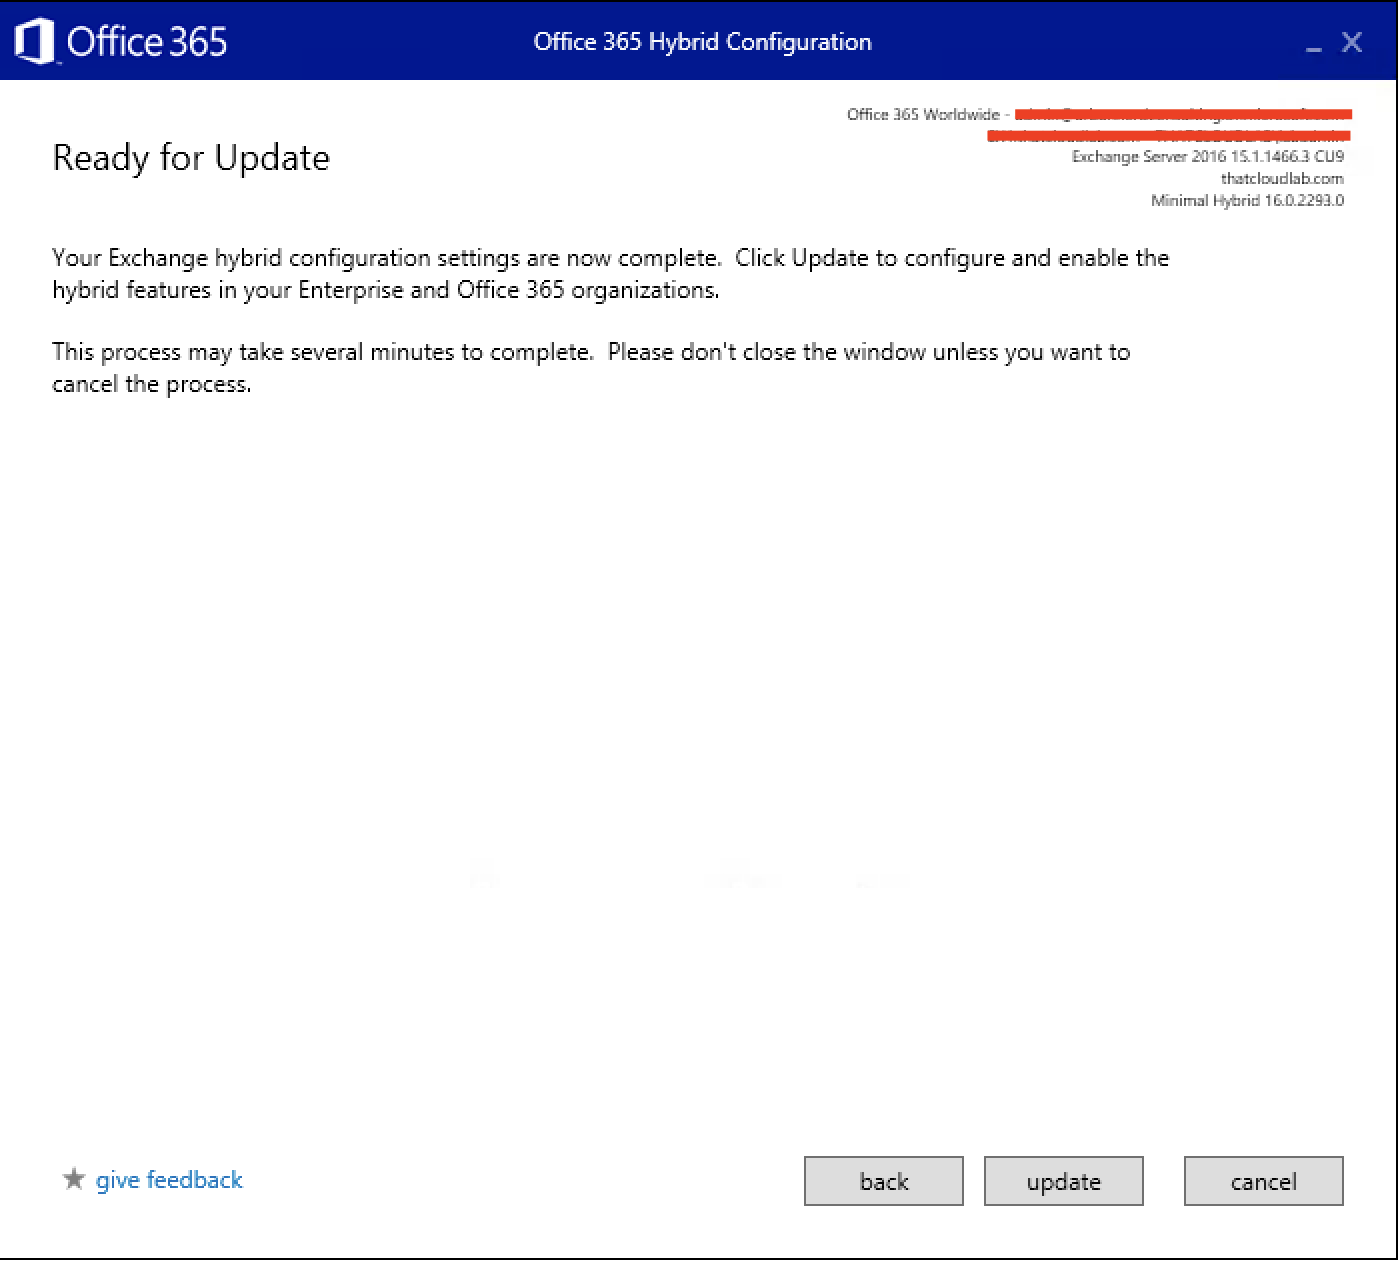
The Wizard looks as follows as it applies the needed changes and configurations.

At the end of the configuration, you can rate the experience of the Wizard and even provide a small feedback on what you think can be done differently or improved in the Hybrid Wizard.

From the on-premises, EAC, click on the Organization Node > Sharing. You will see the auto-created federated sharing policies the wizard created. It is not recommended to change any of these settings

Click the Mail Flow Node > Email Address Policies. You will see the additional policy that allows for both accepting mail from the cloud domain but also adds the additional cloud SMTP suffix.
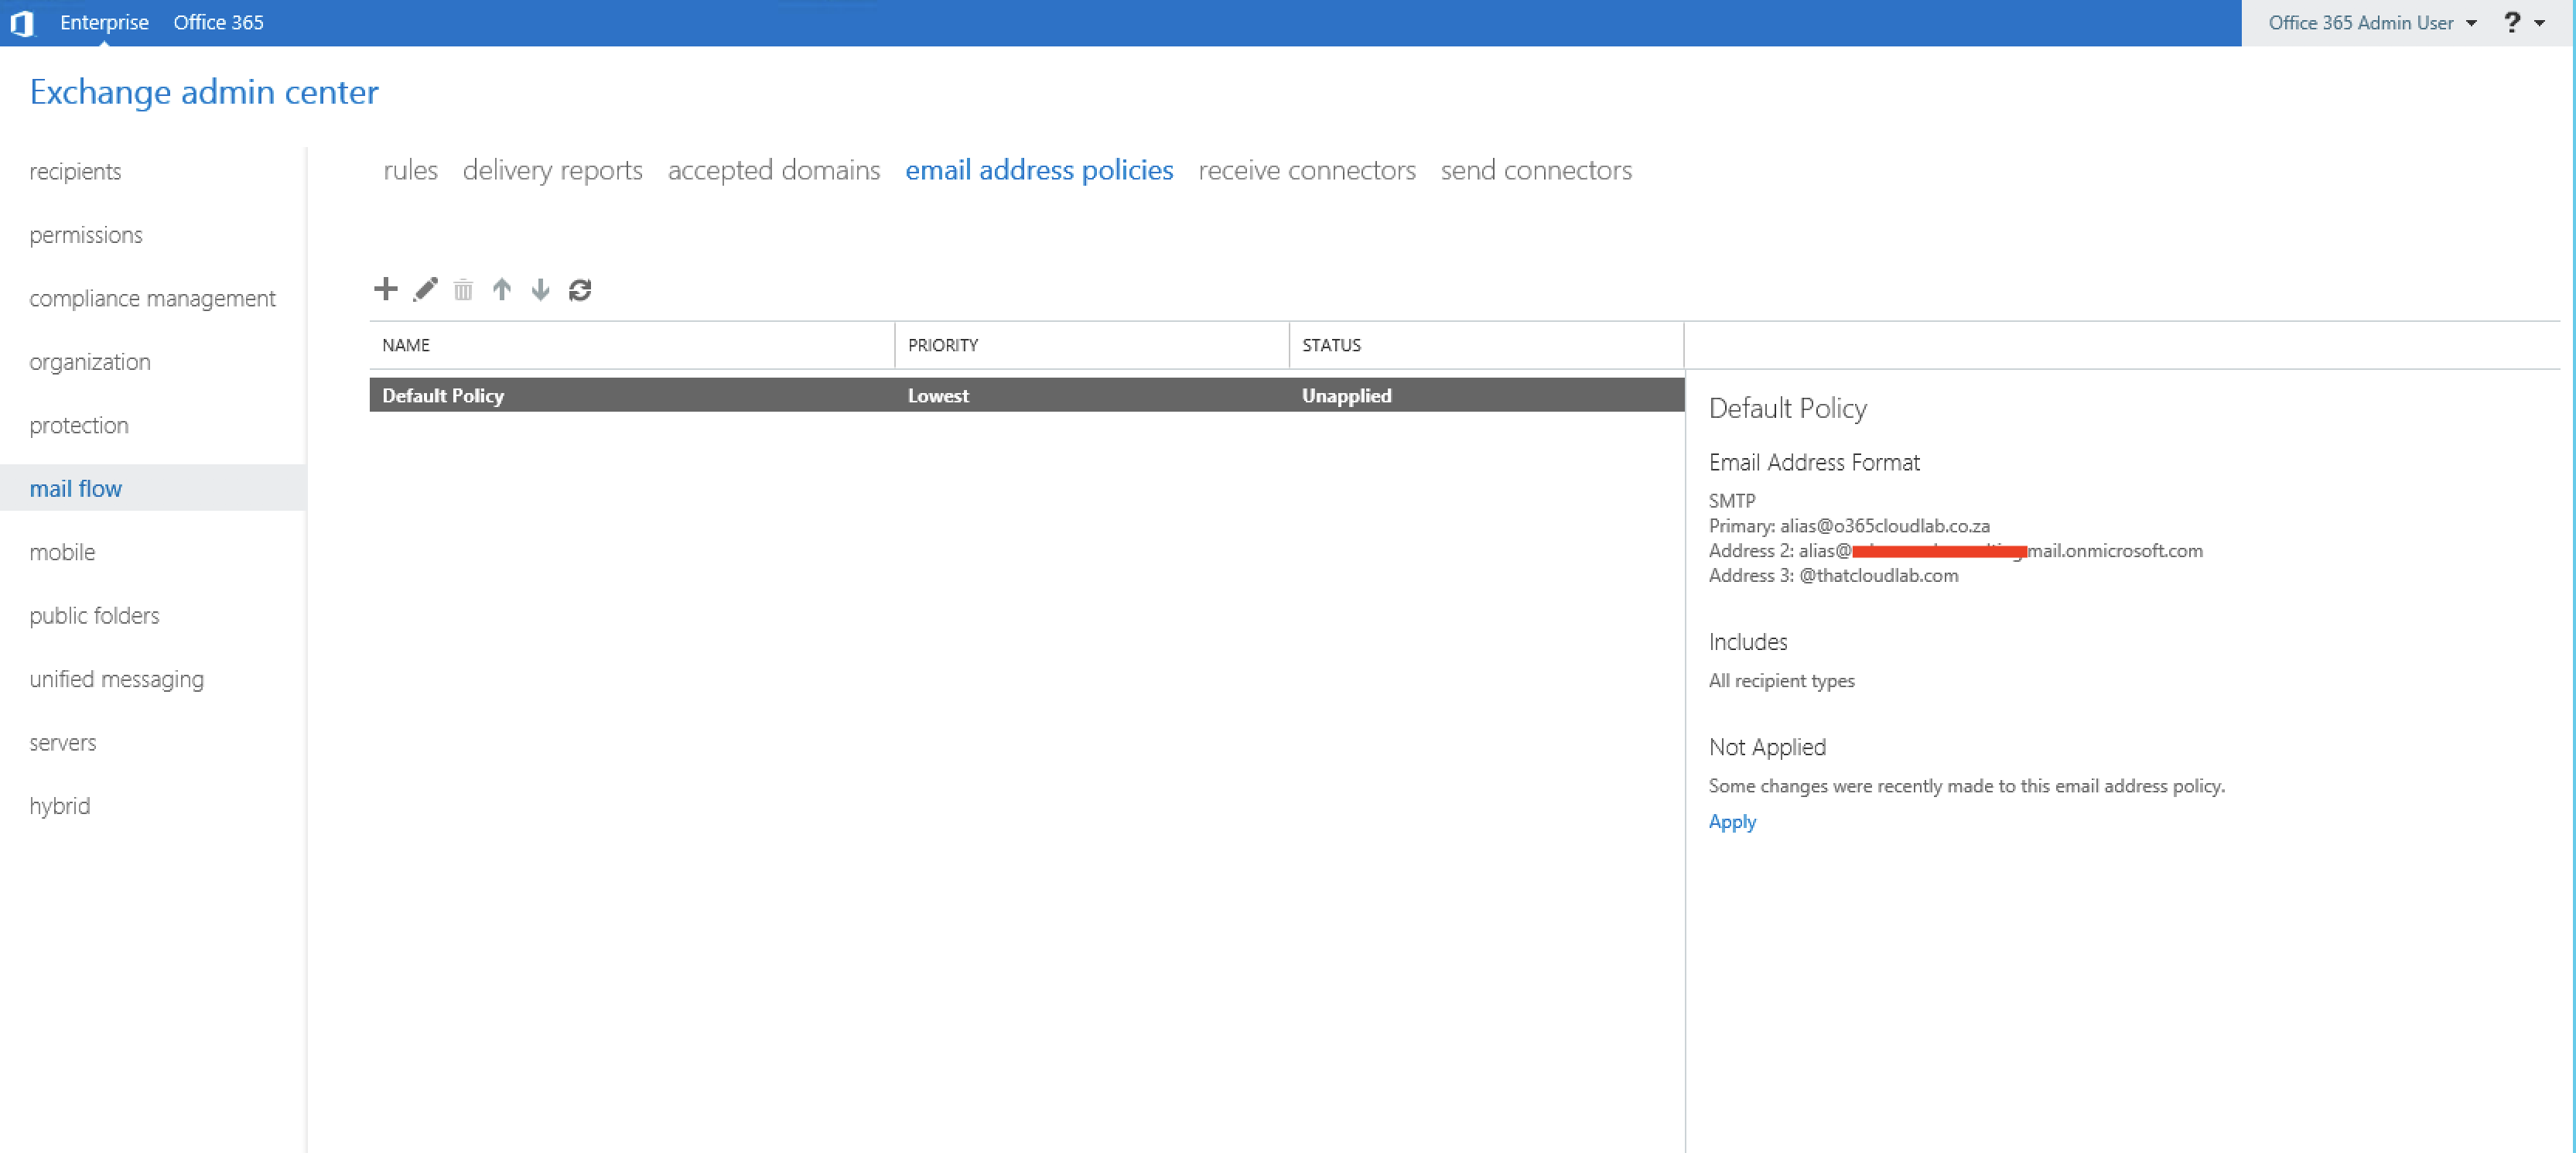
You will also see additional send connector which has been created.

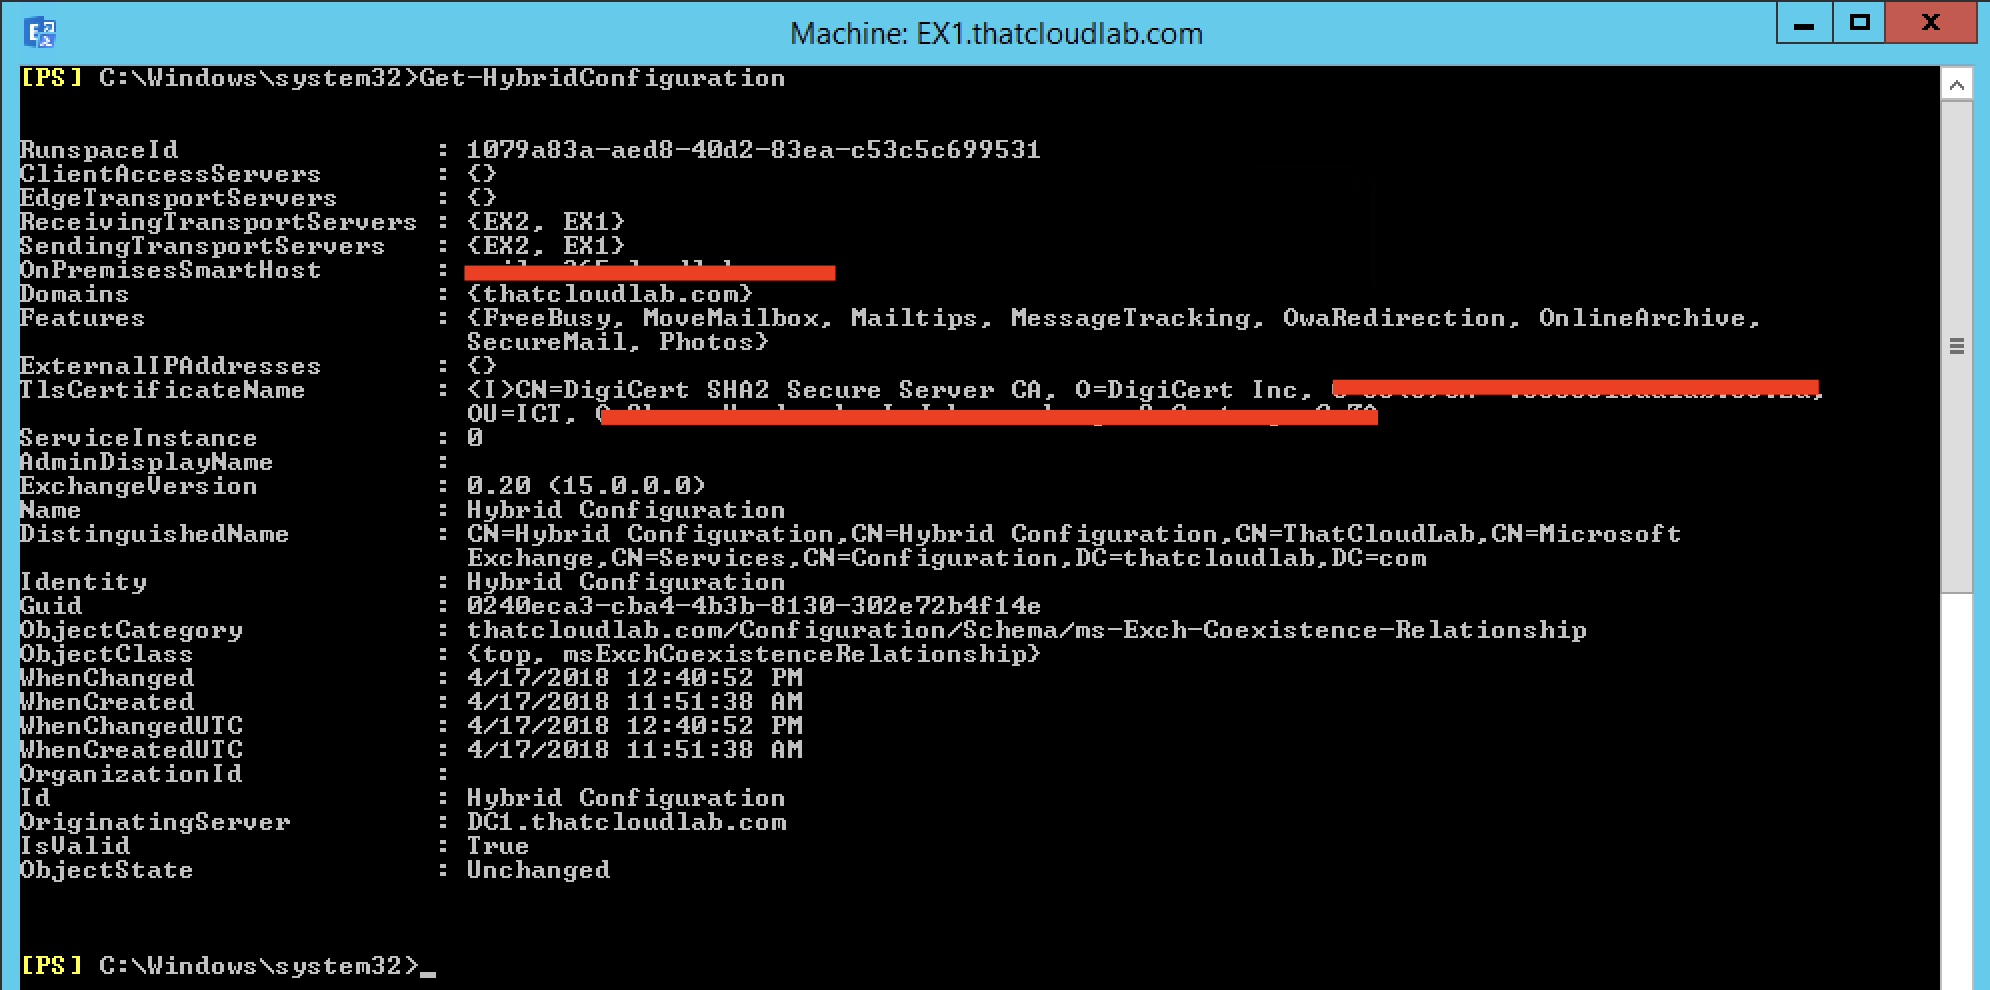
Run the following command, to view what additional settings has been modified during the Hybrid Configuration Wizard.
Open EMS and type the following.
Get-HybridConfiguration
Now that the Hybrid Configuration portion has been configured, now for the next step is to test a Mailbox Migration to Office 365.
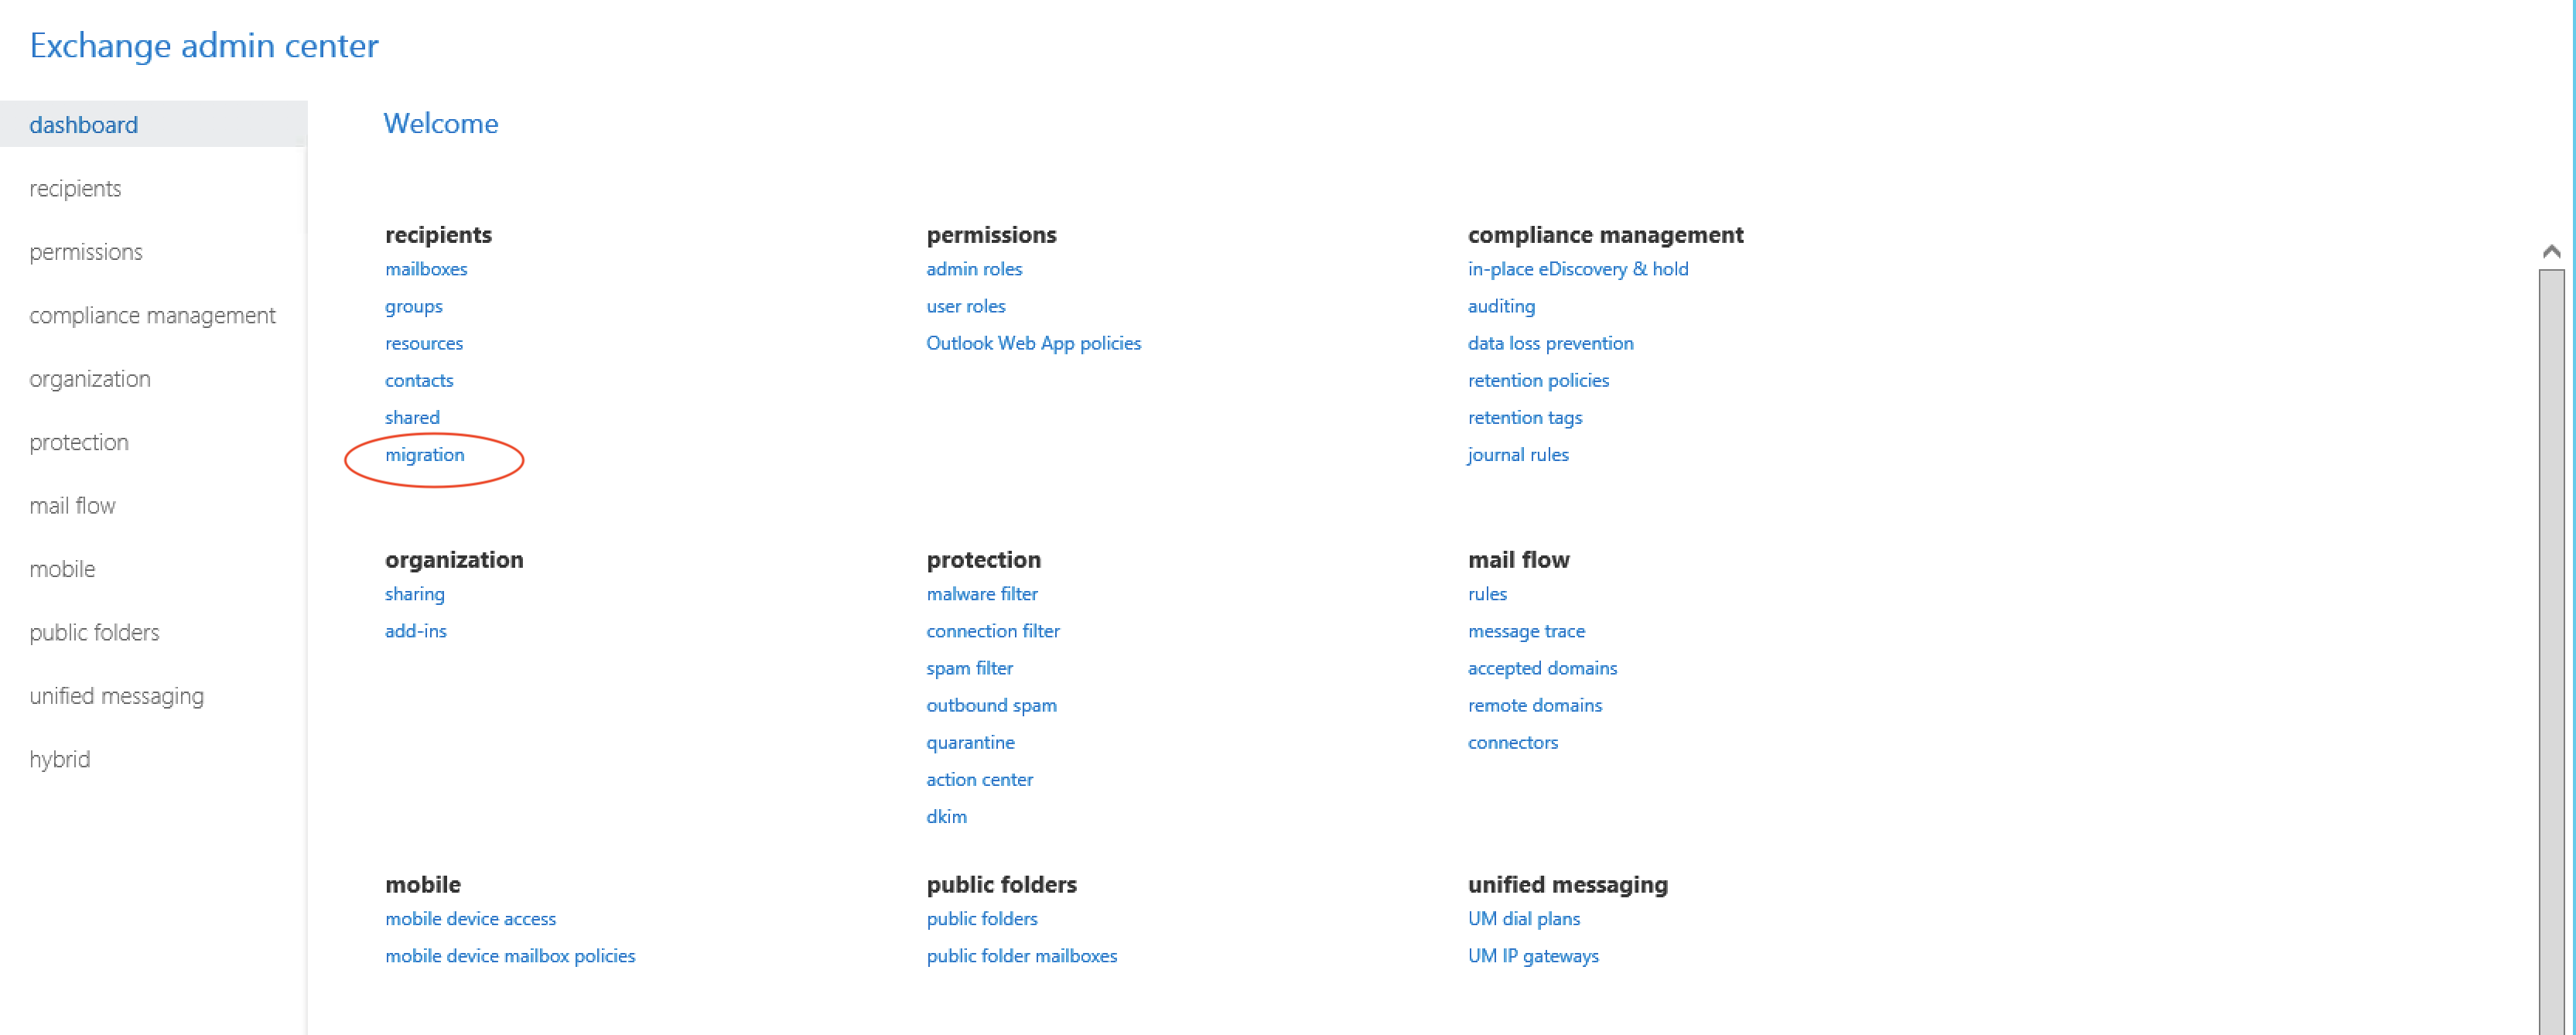
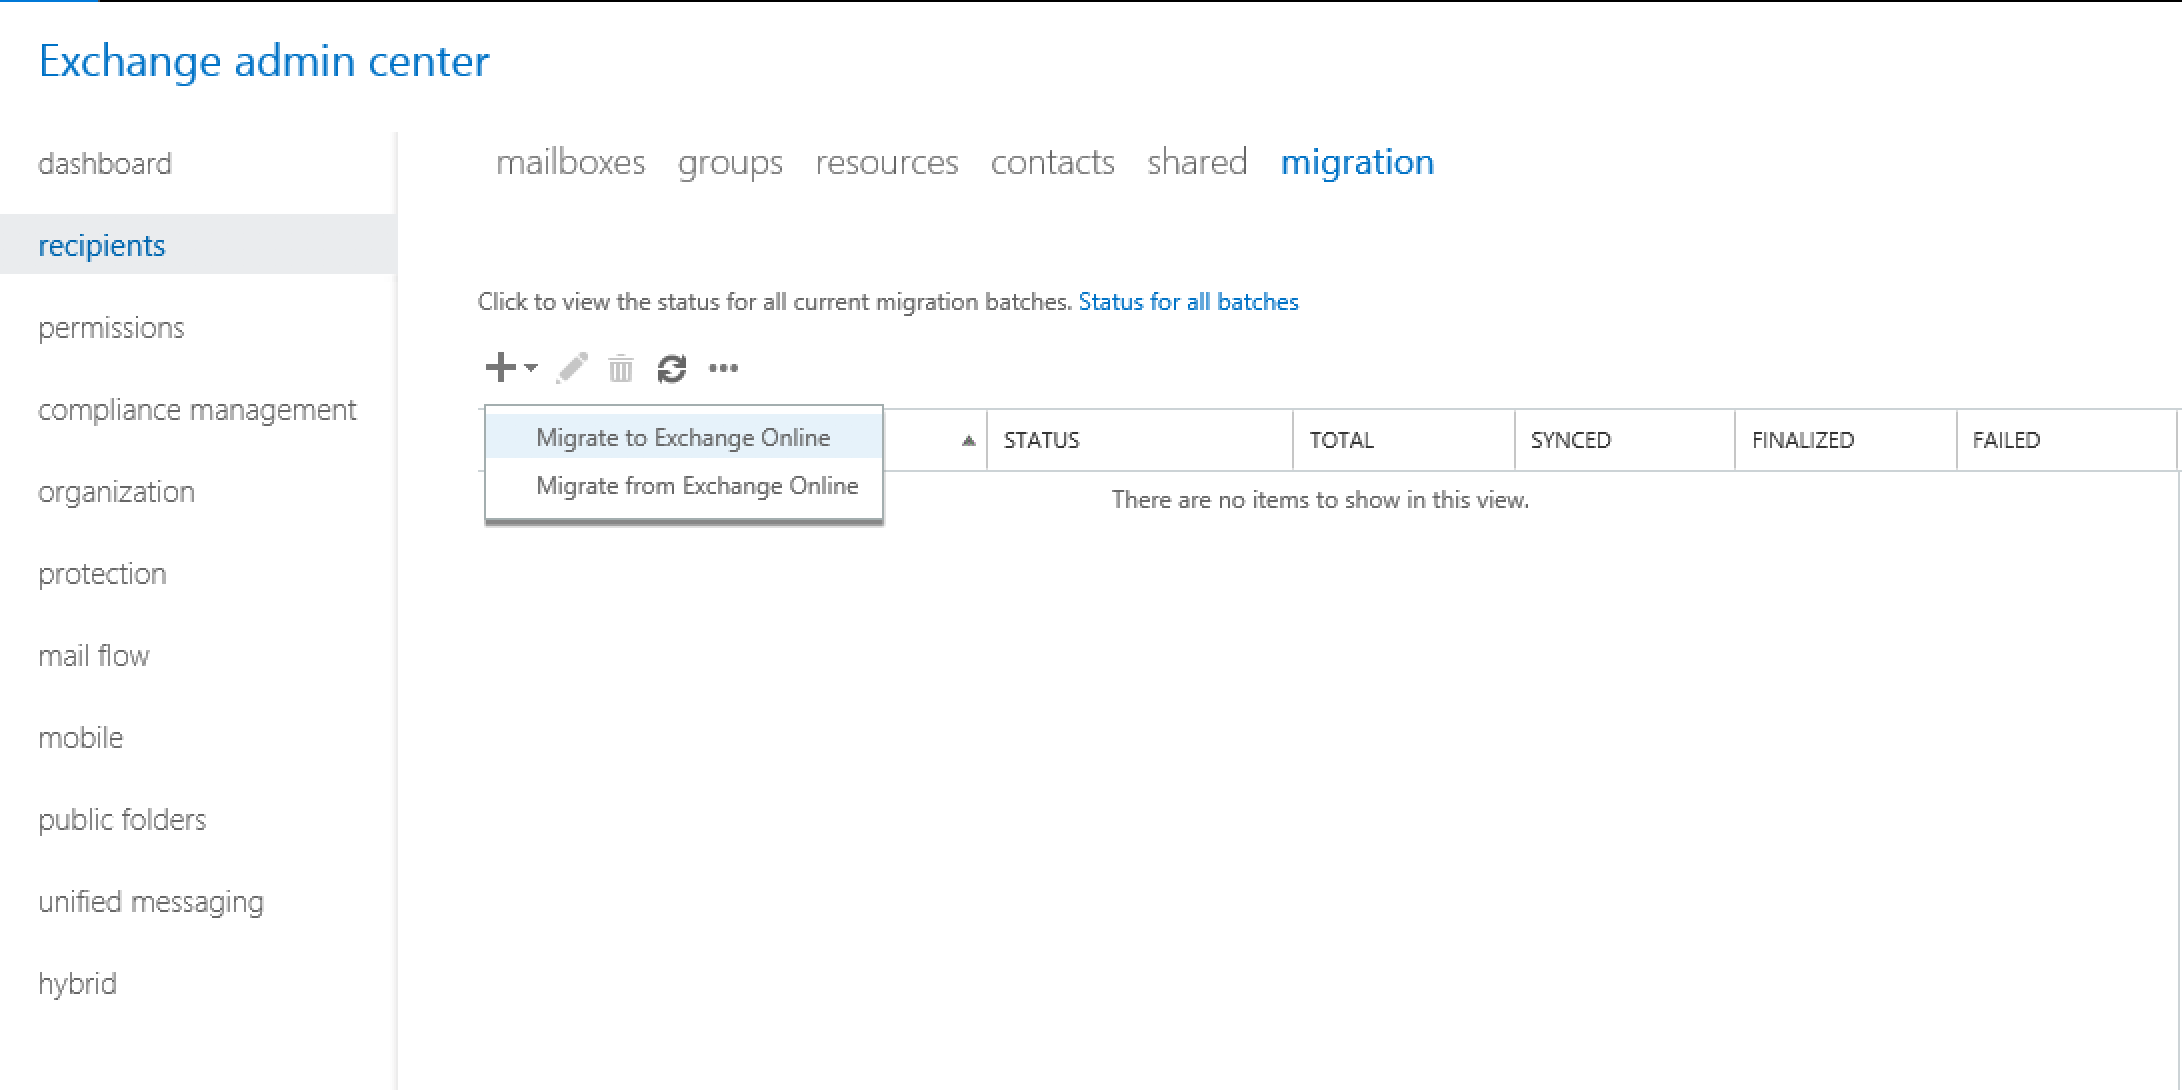
Login to Exchange Online and Navigate to Dashboard, the under Recipients click on Migration.
From the migration tab, click on the + and select “Migrate to Exchange Online”
On the new batch creation windows, select “Remote move migration” then click next

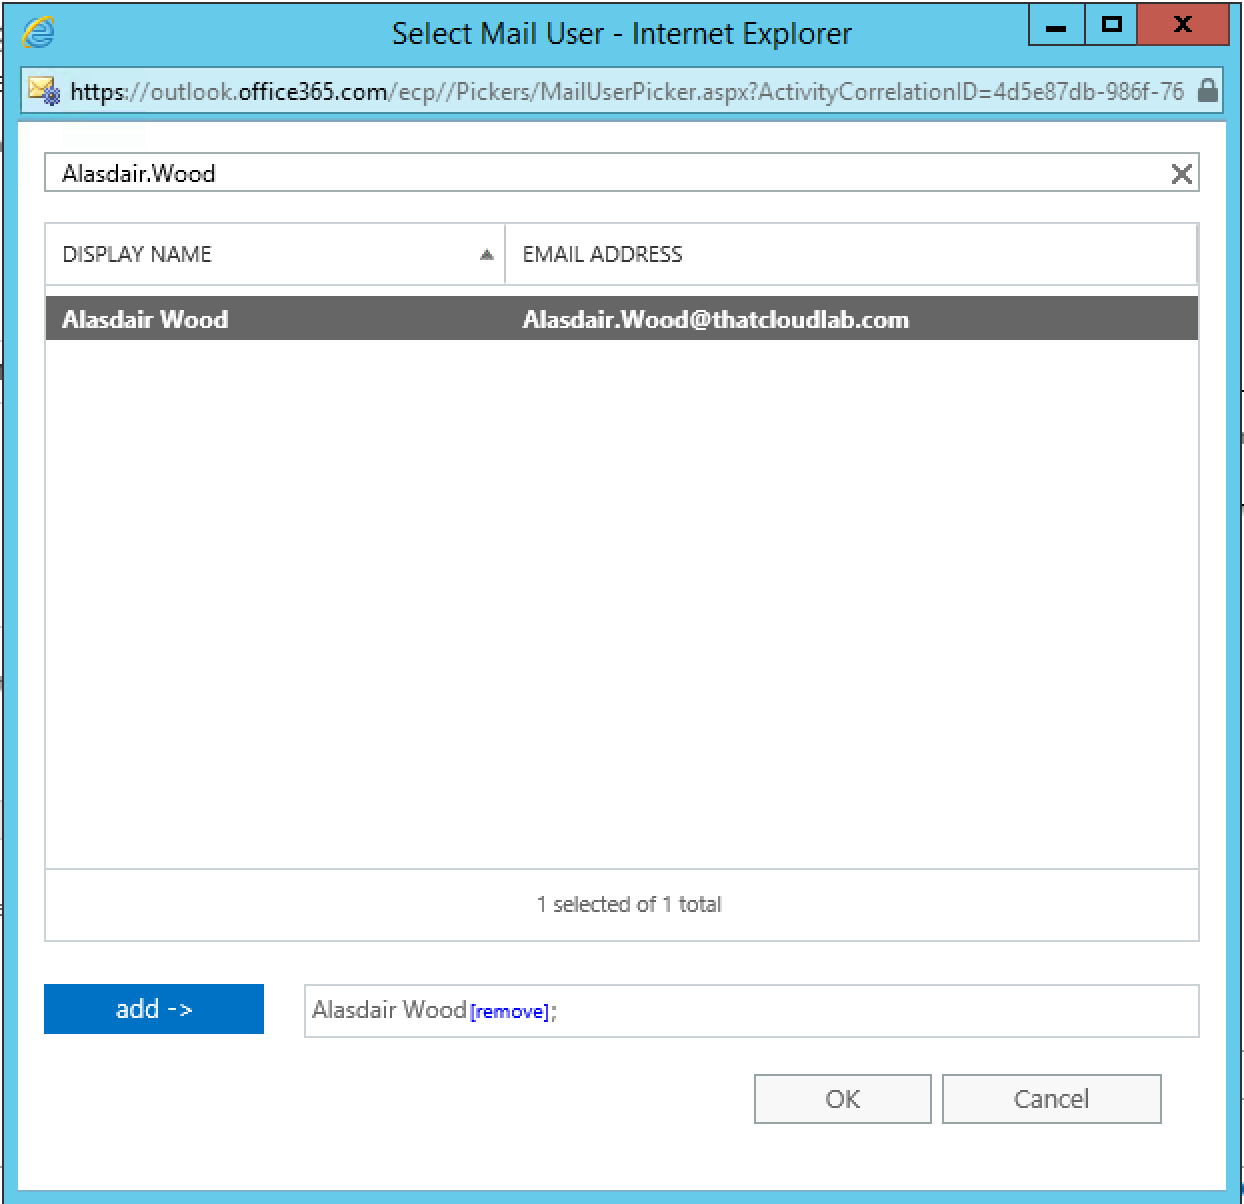
On the next screen, Select the Mailbox that you wish to migrate to Exchange Online.
Once the Mailbox has been selected, Click next

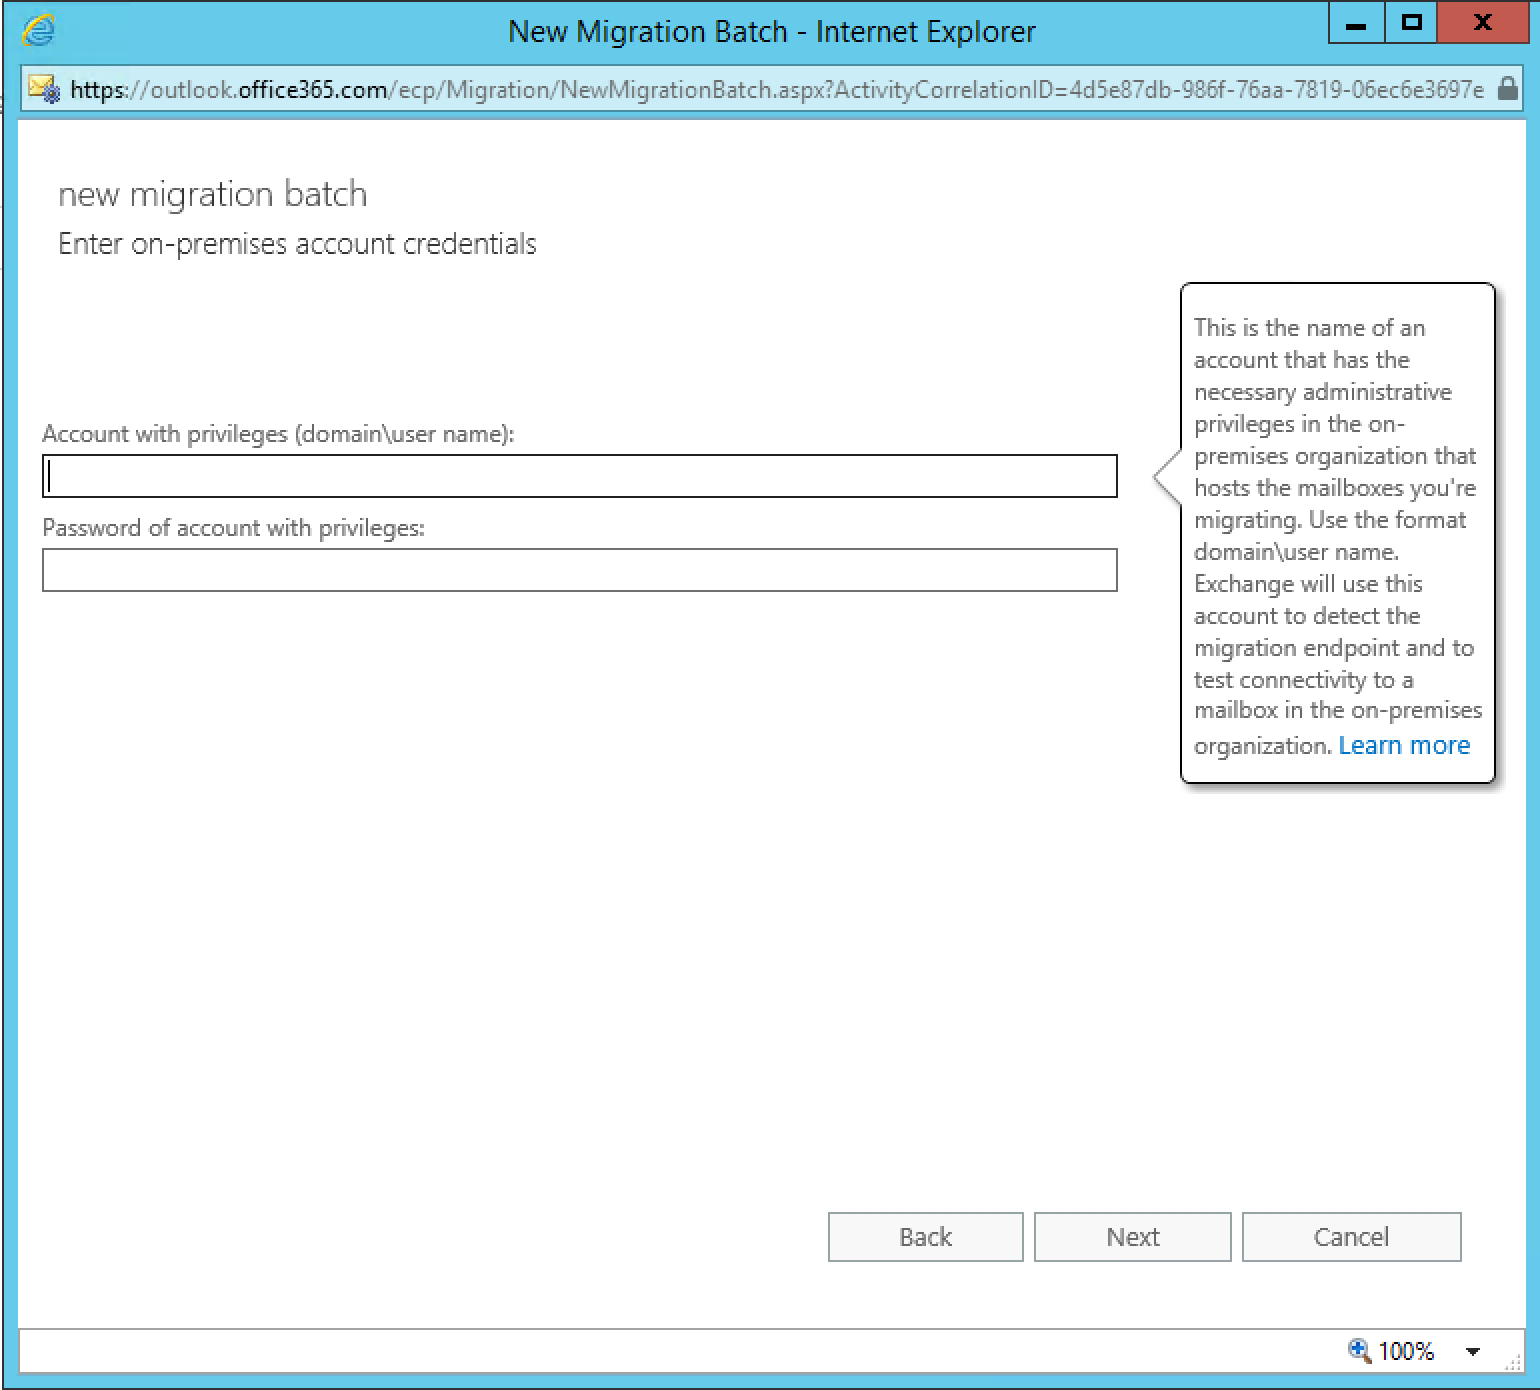
Next you need to provide credentials of an on-premise account that has the necessary permission on the on-premise Exchange Environment. Then click on Next.
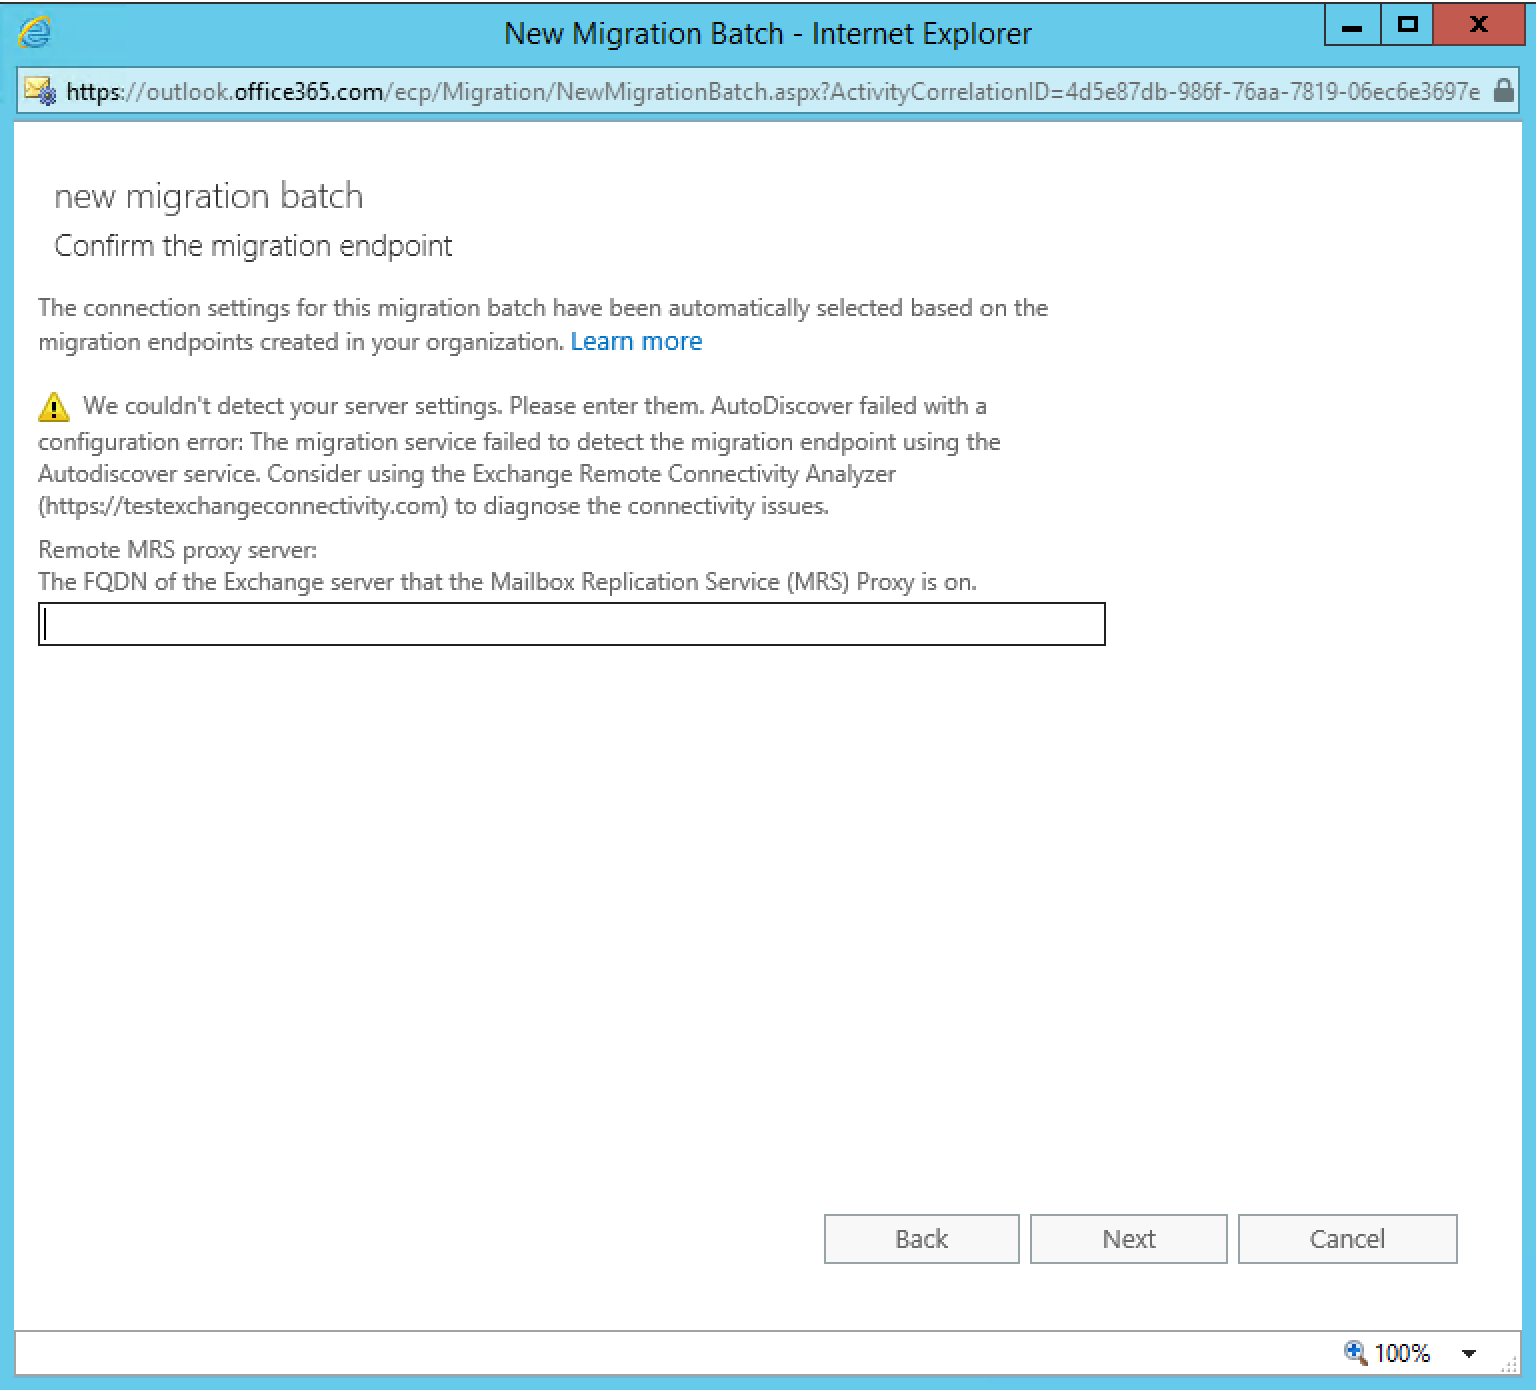
On the following screen, you will have to provide the MRS Proxy Server FQDN.
Example: outlook.thatcloudlab.com
Click on Next , once the MRS proxy FQDN has been provided.
Next, provide a Name for the migration batch job, the Target Delivery Domain does not have to be changed. You can provide the details of the Archive Mailbox if once exists.
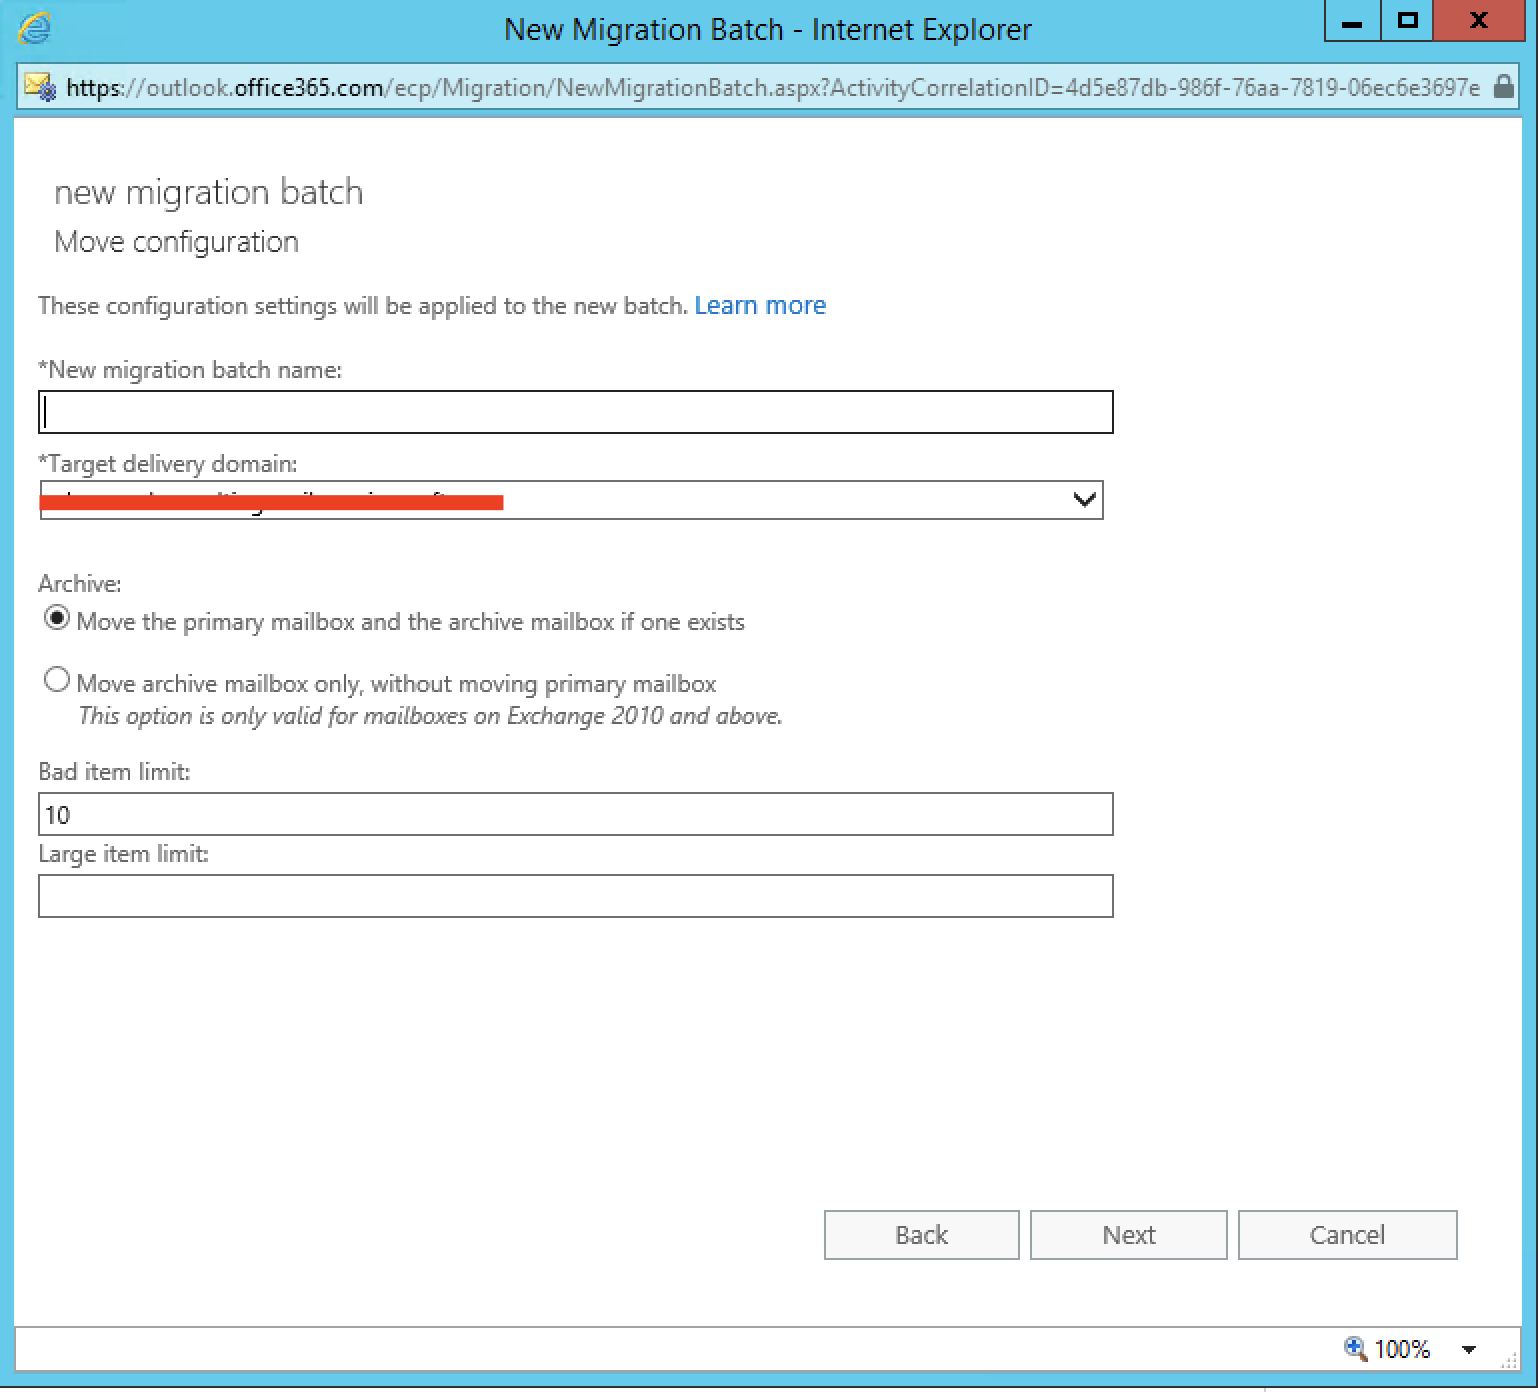
On the last screen, you have the option to schedule when the job should start and who to email when the sync has been completed for the mailbox.
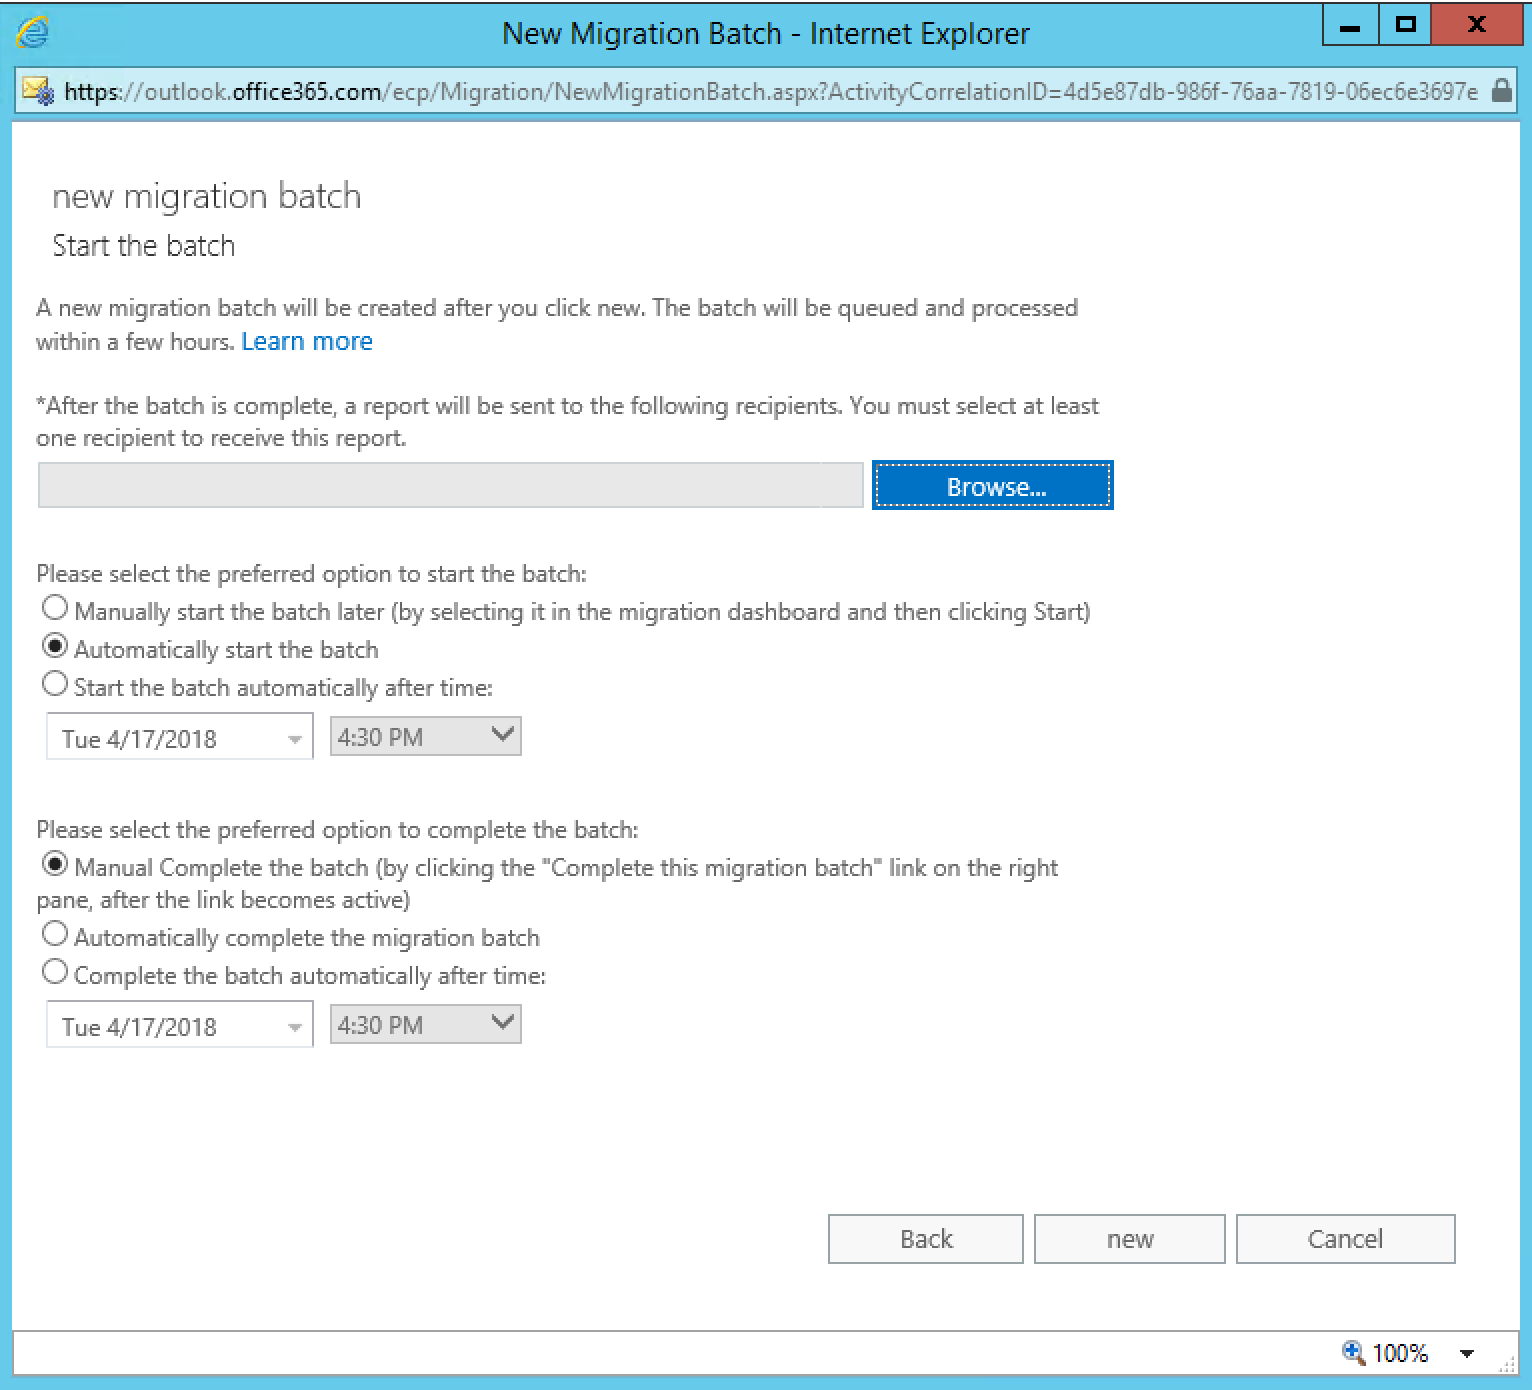
As see from the image above, you have the option to manually complete the migration job or have it completed automatically after the initial sync of the mailbox. Click on New to start the process.
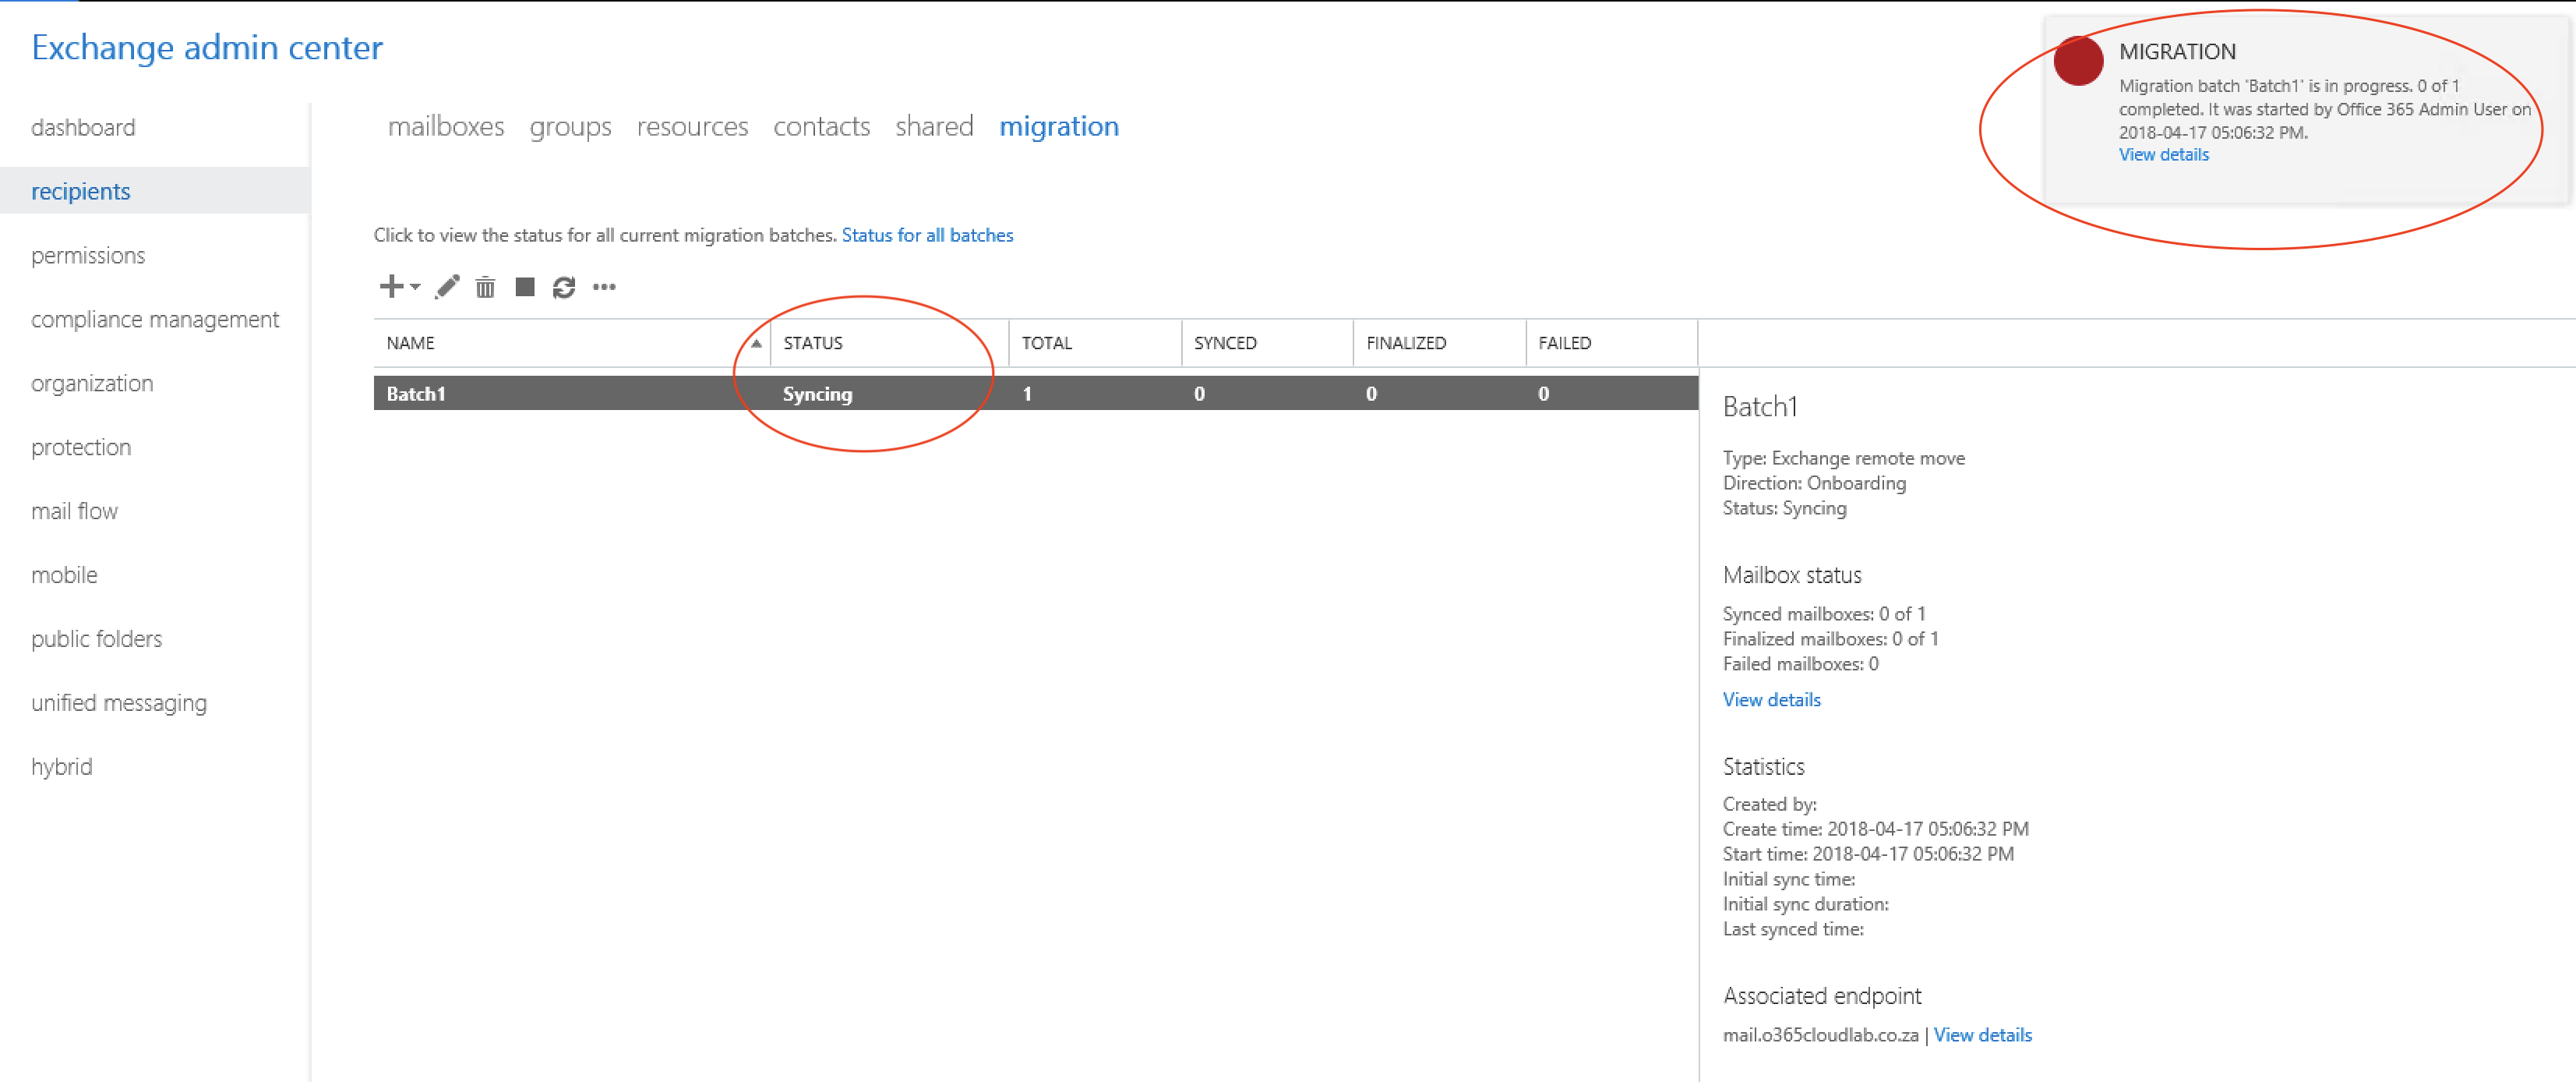
Once you have clicked on new, you will be redirected back to the Migration menu. Here you can see the all batch jobs and their current status.
As you can see from the job we just created it is still in syncing stage. You will also notice from the top right hand corner that a pop up will appear stating the a New migration job has started.
How to find out what the status of a Migration job is
To find the status of a batch Migration job. The following can be run in PowerShell.
Get-MigrationUser | Get-MigrationUserStatistics
As noticed from the image below, you will be able to see how many items has been synched and what the current status of the job is.

When the Batch completes, it will looks as follow.

From the Exchange Online Admin Console, the completed migration. Batch will look as follow.

What Happened to the On-premise Mailbox?
The on-premise, mailbox has changed to a Remote Mailbox once the Migration is done.
We can verify that by running the following from the EMS.
Get-RemoteMailbox -Identity Alasdair.Wood
You will also notice that the RemoteRecipientType will show as Migrated.

Lastly, verify if the migrated user has a valid user license assigned. To verify if the user has a license run the following.
Get-MsolUser -UserPrincipalName Alasdair.Wood@o365cloudlab.co.za |
fl UserPrincipalName, Licenses
As we can see the migrated user does not have any licenses assigned

To assign a valid license run the following.
Set-MsolUserLicense -UserPrincipalName Alasdair.Wood@o365cloudlab.co.za -AddLicenses
“o365cloudlab:ENTERPRISEPACK”

Run the following command again to verify the user license.
Get-MsolUser -UserPrincipalName Alasdair.Wood@o365cloudlab.co.za |
fl UserPrincipalName, Licenses
As we can see now, the user has a valid license assigned now.

And that concludes the Hybrid Configured for Exchange 2016.


