Last updated on Jun 29, 2017
In this Post we will cover how to create a Retention Tag and Retention Policy in Exchange Online.
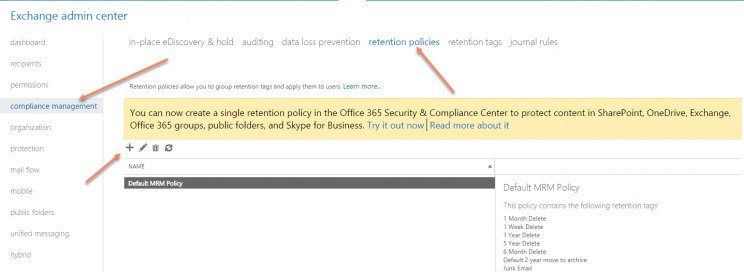
Launch the Exchange Online EAC and navigate to Compliance and Retention Tags.

Create a Retention Policy to Automatically move all Mailbox Items from 1 Year to Archive.
- Click (+) Tab then
- Click apply automatically to entire mailbox

- Complete the Name Field
- Select “Move to Archive” below “Retention action”
- Select “When the item reaches the following age” below “Retention Period” give it a value of 356 days.
- Click Ok the Continue

Create a “Retention Policy” for the Retention Tag created.
- Navigate to Compliance then “Retention Policies” and then click on (+) tab.

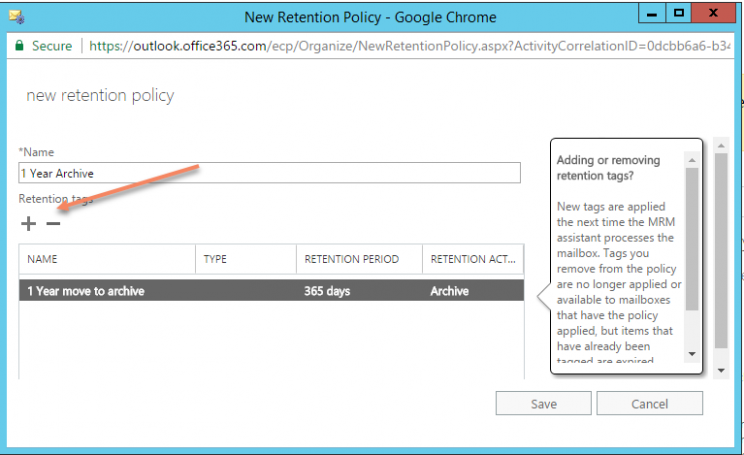
- Provide a Policy Name and then click on (+) below “Retention Tags”
- Select the newly created “Retention Tag”
- Click Save

How to create Retention Tags and Policies using Powershell
Connect to Exchange Powershell using the Quick Connect script Here: https://gallery.technet.microsoft.com/Connect-To-Office-365-9b235018?redir=0


Run the following command to get the current Retention Tags and Policies
|
1 |
Get-RetentionPolicy |

And Then
|
1 |
Get-RetentionPolicyTag |

Now let’s continue and create the following Retention Tag
- Name: Managers Deleted Items
- Delete and Allow Recovery set to 180 days
|
1 2 |
New-RetentionPolicyTag -Name Managers-Deleted-Items -RetentionAction DeleteAndAllowRecovery -AgeLimitForRetention 180 -Type DeletedItems |

|
1 2 |
New-RetentionPolicy -Name Keep-Deleted-Items-Management -RetentionPolicyTagLinks Managers-Deleted-Items |

#ThatLazyAdmin


[…] Creating Retention Tags and Policies Office 365 […]