
Set Azure Diagnostic settings to Log Analytics workspace using Azure policy.
Set Azure Diagnostic settings to Log Analytics workspace using Azure policy.
In this post, we will look at how to use Azure Policy to set Diagnostic settings to Log Analytics workspace.
Let’s get started, sign in to Azure Admin Portal and type “Azure Policy” in the search bar.

Select Policy.
On the Policies page, Click on “Definitions” on the bottom left-hand side.

On Definitions, you will find several Built-in policies ranging from Auditing to Deploying Agents.

For the purpose of this demonstration, we will search for “Diagnostics Settings” in the search bar.
You will find a list of diagnostics settings you can configure to Log Analytics Workspace.

I will select diagnostics settings for Storage Accounts.
![]()
On the next page, you will get an description of the policy as well as the policy template at the bottom.

To deploy this built-in policy, click on “Assign” on the top left-hand corner.

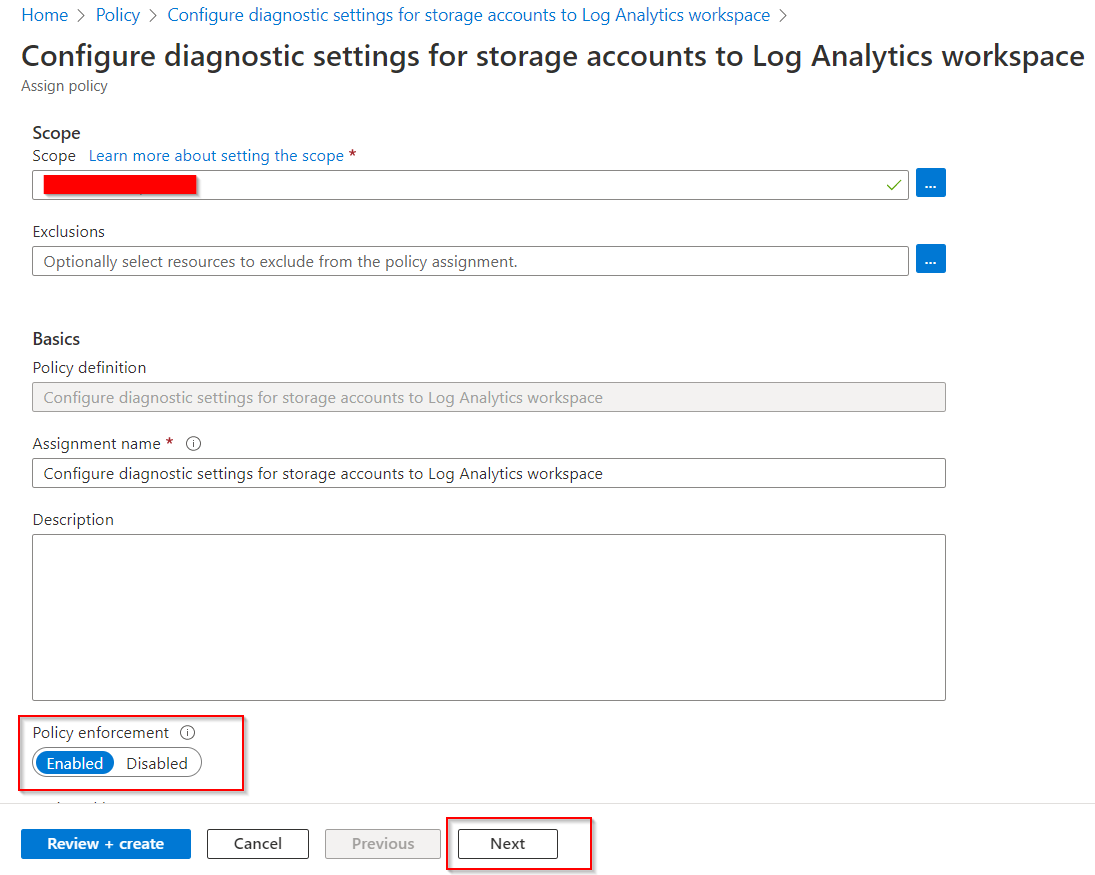
Here we need to define the scope where we want the policy to apply to. This can be a Subscription or a Resource Group.
Click on Scope and

select your subscription.

You can decide of you want to add any exclusions, I will skip exclusions for now.
Click on Next at the bottom of the page, to move on to the parameters.
On the Parameters section we need to specify the Log Analytics Workspace and then click Next.

On the Remediation section of the policy, here we need to define what the policy should do if a resource has already been deployed. By default, Azure Policies apply to newly created resources, that’s why we need to create a Remediation task which will deploy to existing resources.
Select the tick “Create a remediation task”

Policies that need to deploy to resources that doesn’t have a policy applied or that needs to modify existing resources require an existing user assigned managed identity or creating a system assigned managed identity.
Here we will select System assigned Identity and then specify the Azure Region for the System assigned Identity.

Keep the permission as default and click on Next.

Next, you need to provide a Non-Compliance message so users can see why their resources are non-compliant. Here I will just say “Storage Account does not have Diagnostics Settings configured for Log Analytics”

Once done click on Review + Create.

Let’s head back over to the Policy page, here you can view the newly assigned policies.

Now that the policy has been created, lets head over to the storage account and verify if the policy has been applied.
Select a Storage Account and scroll down to Diagnostics Settings on the right-hand side you will see your storage account and here you can see that the Log Analytics workspace has been created.

You can also verify from Azure Policy which storage accounts has been configured.
From the Azure Policy page, select the Policy you have created from the Home page.

On the assigned policy, you have a chart which will show you how many resources have the policy applied and which resources are not compliant. You can then drill further down into the non-compliance resources and troubleshoot why they are not complaint.

And this is how you can use Azure Policies to define a set a rule for your Azure environment. This was just a small part of what we can achieve with Azure Policy.
In up coming posts we will look at what else we can define with Azure Policy.


